Hier ist eine Sammlung von Funktionen, die nicht offensichtlich sind, aber jeder kennen sollte.
1. Interface & Ansicht (Aufräumen)
- Tabulator (Tab): Blendet alle Seitenleisten auf einmal aus/ein. Perfekt, um das Bild kurz in Groß zu beurteilen.
- Strg + Shift + L: Schaltet den „ISO 12646 Modus“ ein (weißer Rahmen um das Bild im Dunkelkammer-Modus, um Farben neutraler beurteilen zu können).
- B: Blendet die Rahmen/Pfeile zum Ausklappen der Leisten aus.
- Shift + T: Tooltips an/aus.
2. Schnelleres Arbeiten mit Reglern
Das ist der größte „Aha-Effekt“ für viele:
- Rechtsklick auf einen Regler: Öffnet ein grafisches Pop-up, in dem man den Wert viel feiner einstellen oder direkt eintippen kann.
- Doppelklick auf einen Regler: Setzt ihn auf den Standardwert zurück.
- Mausrad über Regler: Verändert den Wert.
- Trick: Wenn du dabei Strg hältst, änderst du den Wert in viel kleineren Schritten (Feinjustierung).
3. Masken & Formen (Dunkelkammer)
- Mausrad im Masken-Kreis: Verändert die Größe
- Shift + Mausrad: Verändert die weiche Kante (Härte) der Maske.
- Strg + Klick auf eine Form: Fügt einen neuen Punkt zu einem Pfad hinzu (oder schließt ihn).
- Rechtsklick auf eine Form: Löscht den Punkt oder die ganze Form (je nach Kontext).
- Masken anzeigen (Gelb): Klicke auf das kleine gelbe Kreis-Icon unten rechts im Modul (neben dem Masken-Symbol), um die Maske dauerhaft gelb eingeblendet zu sehen.
4. Leuchttisch (Verwaltung)
- Z: Vorschau-Modus (Zoom). Zeigt das Bild unter der Maus sofort groß an, solange du die Taste drückst. (Oder
Alt + wfür dauerhaftes Vollbild). - Strg + z: Fokus-Peaking im Leuchttisch! Zeigt dir mit farbigen Rändern an, welche Teile des Bildes scharf sind. Genial zum Aussortieren.
- Tasten
1–5vergeben Sterne. Taste0entfernt Sterne. Taster(reject) lehnt ab. - Strg + c / Strg + v: Kopiert den kompletten Bearbeitungs-Verlauf (History Stack) von einem Bild und fügt ihn auf ein anderes ein.
- Profi-Tipp: Strg + Shift + C öffnet einen Dialog, in dem du auswählen kannst, welche Module du kopieren willst (z.B. nur den Weißabgleich, aber nicht die Belichtung).
5. Bildbearbeitung (Dunkelkammer)
- Rechtsklick + Ziehen (im Bild): Rotiert das Bild / Horizont begradigen.
- Mausrad über dem Bild: Zoomt rein/raus.
- Wichtig: Das Zentrum des Zooms ist dort, wo die Maus ist.
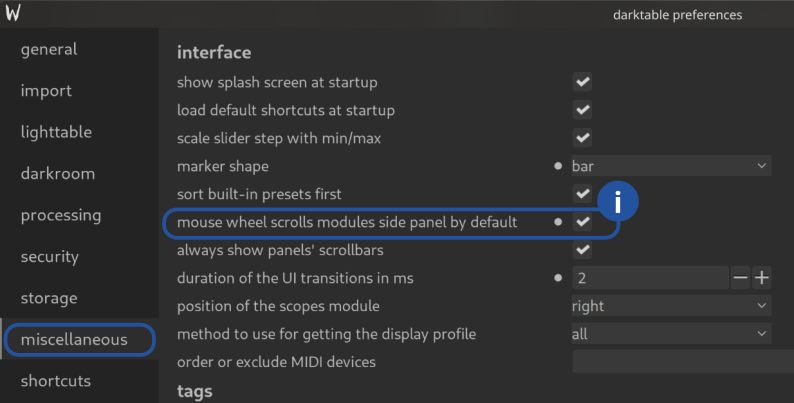
6. Mit dem Mausrad Module scrollen
Mausrad / Touchpad zum Scrollen der Menüs: Mausrad blättert standardmäßig die Module der seitlichen Panele durch – Aktivieren.
Jetzt können die Schieberelger mit Shift / Strg / Alt verschoben werden.
Fragen zu diesem Thema? Diskutiere mit uns im Forum!
Letzes Update: Januar 22, 2026