Here is a collection of features that are not obvious, but everyone should know.
1. Interface & View (Clean up)
- Tab key (Tab): Hides/shows all sidebars at once. Perfect for briefly assessing the image in large size.
- Ctrl + Shift + L: Toggles “ISO 12646 Mode” (white border around the image in Darkroom mode to assess colors more neutrally).
- B:Hides the borders/arrows for expanding the panels.
- Shift + t: Tooltips on/off.
2. Faster Work with Sliders
This is the biggest “Aha moment” for many:
- Right-click on a slider: Opens a graphical pop-up where you can adjust the value much more finely or type it in directly.
- Double-click on a slider: Resets it to the default value.
- Mouse wheel over slider: Changes the value.
- Trick: If you hold Ctrl while doing this, you change the value in much smaller steps (fine-tuning).
3. Masks & Shapes (Darkroom)
- Mouse wheel inside mask circle: Changes the size
- Shift + Mouse wheel: Changes the soft edge (hardness) of the mask.
- Ctrl + Click on a shape: Adds a new point to a path (or closes it).
- Right-click on a shape: Deletes the point or the entire shape (depending on context).
- Show masks (Yellow): Click on the small yellow circle icon at the bottom right of the module (next to the mask symbol) to see the mask permanently displayed in yellow.
4. Lighttable (Management)
- z: Preview mode (Zoom). Shows the image under the mouse immediately in large size as long as you press the key. (Or
Alt + wfor permanent full screen). - Ctrl + F: Focus peaking in the lighttable! Shows you with colored edges which parts of the image are sharp. Brilliant for culling.
- Keys
1–5assign stars. Key0removes stars. Keyr(reject) rejects. - Ctrl + c / Ctrl + v: Copies the complete history stack from one image and pastes it onto another.
- Pro Tip: Ctrl + Shift + c opens a dialog where you can select which modules you want to copy (e.g., only the white balance, but not the exposure).
5. Image Processing (Darkroom)
- Right-click + Drag (on image): Rotates the image / straighten horizon. Only works if the “Rotate and Perspective” module is active (it usually is).
- Select any edit in “history” (History Stack), click on “take snapshot” in Snapshot module: Creates a snapshot at this point. You can then click on the at the top to get a split-screen (Before/After) comparing it to other edits.
- Mouse wheel over the image: Zooms in/out.
- Important: The center of the zoom is where the mouse is.
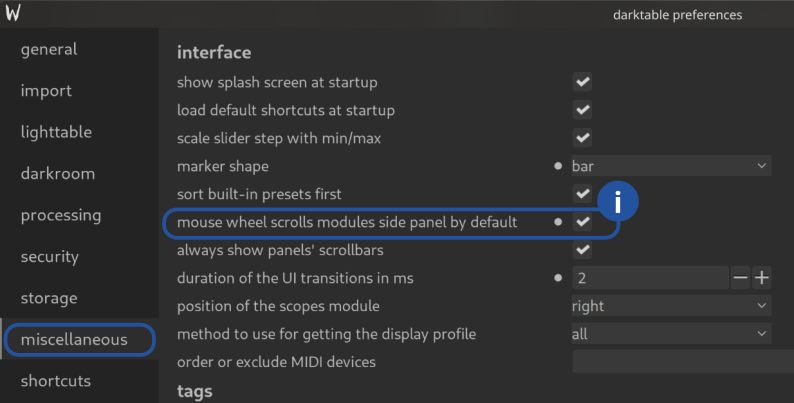
6. Scroll Modules with Mouse Wheel
Mouse wheel / Touchpad to scroll menus: Mouse wheel scrolls through the modules of the side panels by default – Activate.
Now the sliders can be moved with Shift / Ctrl / Alt.
February 4, 2026