What is it about?
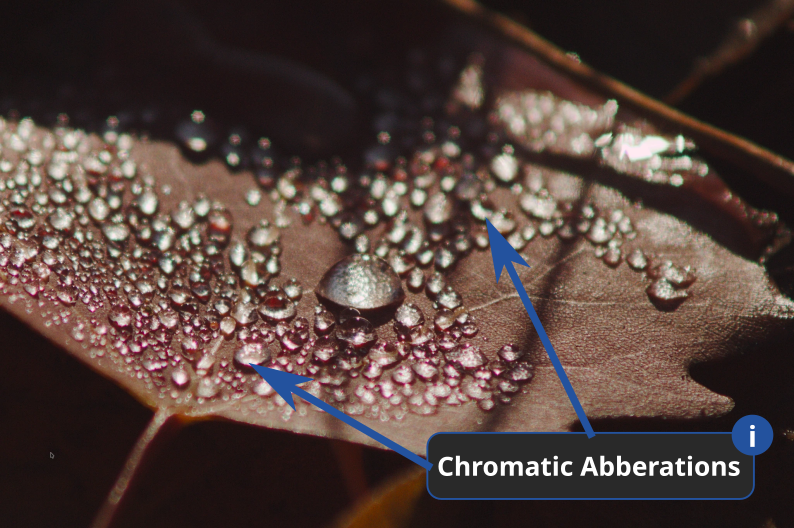
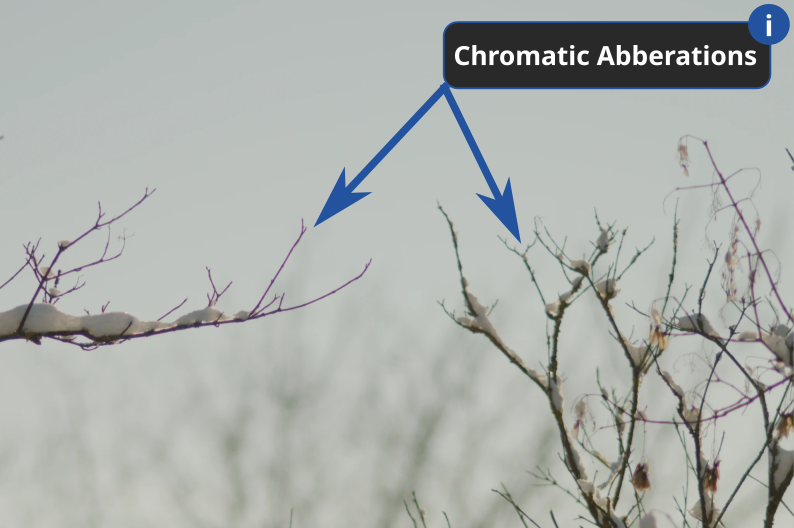
Chromatic aberrations (CA) are color errors caused by the lens. They often appear as ugly purple, green, or red color fringes on high-contrast edges (e.g., branches against a bright sky).
Darktable has three modules that deal with chromatic aberrations:
- Raw Chromatic Aberrations
(in the next section) - Chromatic Aberrations
(see further below) - Lens Correction
Raw Chromatic Aberrations
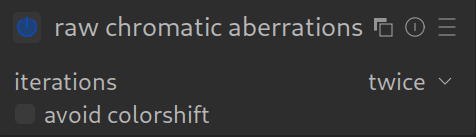
The module Raw Chromatic Aberrations works on the raw sensor data.
NOTE 1: Raw Chromatic Aberrations only works for Bayer sensors (the majority of modern sensors).
It does not work on monochrome photos. For this case, use the Chromatic Aberrations module instead – see below.
NOTE 2: Do not use the TCA correction options in the Lens Correction module if you are using the Raw Chromatic Aberrations module.
When to use it?
For slight CAs. If Lens Correction supports your lens, Raw Chromatic Aberrations is generally the better choice!
How to apply it?
Simply activate it.
Often color fringes are still visible; in that case, use the Chromatic Aberrations module instead (see below).
If it has no effect for you, then deactivate it again! It is calculated via the CPU and can therefore (significantly) impair the speed of darktable.
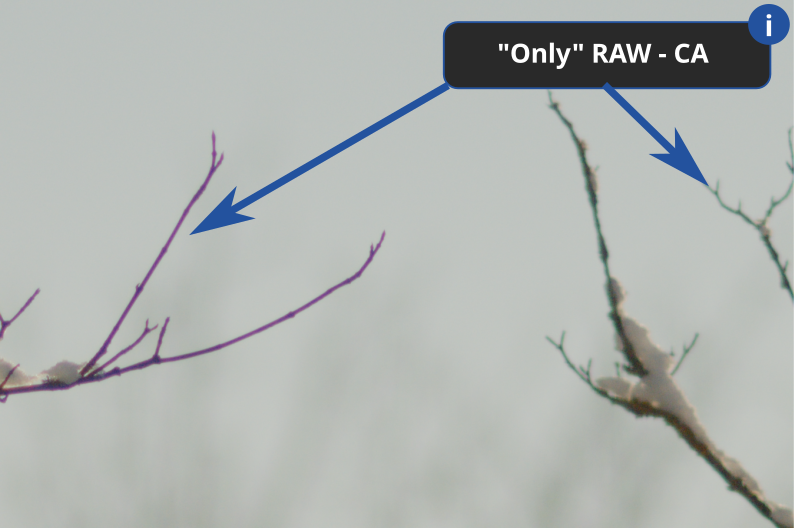
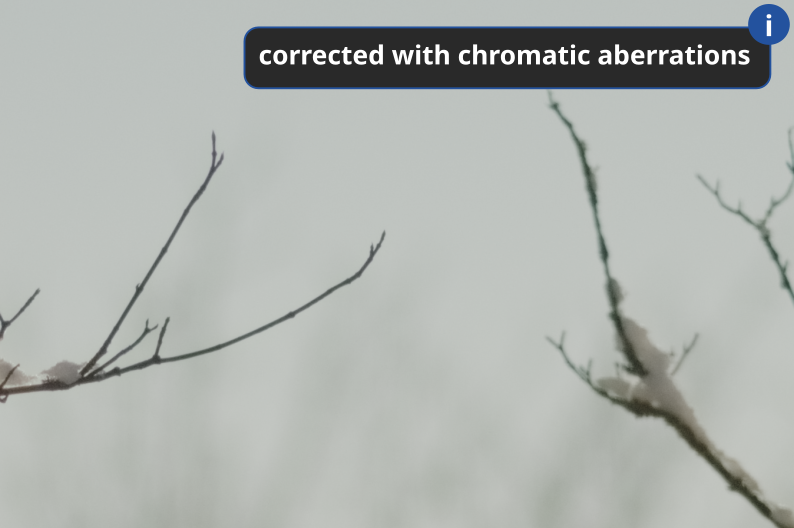
Example:
Without modules for removing chromatic aberrations.

With only Raw Chromatic Aberrations module applied.
You don’t see a difference? Neither do we.
With strong CAs, Raw Chromatic Aberrations has hardly any effect.
In the next paragraph, you will find a good alternative.
Chromatic Aberrations
When to use it?
- If Raw Chromatic Aberrations is not sufficient for correction and/or your camera is not a Bayer sensor.
- If Lens Correction does not support your lens or the correction is not sufficient.
- If your image has stubborn chrominance noise (noise with differently colored pixels close to each other) that other denoising methods do not fully correct.
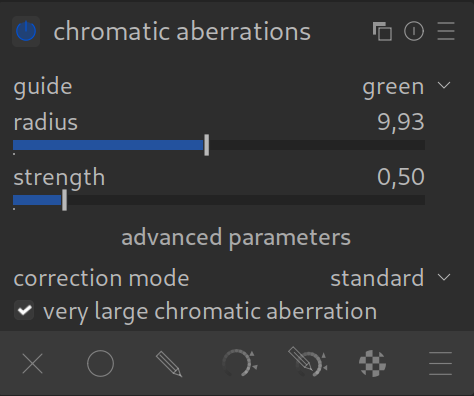
How to apply it?
- Activate the module.
- Often, simply turning it on is enough.
- If not, you can adjust the available parameters to tell the module exactly what should be recognized as a “color fringe” and how it should try to correct it.

For more information, see the official manual: raw chromatic aberrations or chromatic aberrations.
Questions about this topic? Discuss with us in the forum!
January 27, 2026
I just stumbled across this as i know that code very well. I think the “ProTip: always enable” is just bad. For most modern lenses it’s simply not required and can even possibly introduce artefacts.
If there would be a pro tip it would be: “If you have lenses that regularly produce CA you should define auto-applied presets for that lens both in raw chromatic aberration and lens correction module”. This original “ProTip” sort of simplification would certainly lead to darktable quality impairments.
Thank you very much for your message and suggestion. We have removed the problematic section/paragraph and will revise it again.
Best regards, Chris
Should this be used alongside the TCA correction in the Lens Correction module (which is enabled by default)? The manual (https://docs.darktable.org/usermanual/development/en/module-reference/processing-modules/raw-chromatic-aberrations/) explicitly warns against using both modules at the same time.
If not, which is recommended to use by default, the Raw Chromatic Aberrations modules, or the TCA correction from the Lens Correction module?
Raw Chromatic Aberration: Enable (On).
This addresses color fringing at the raw level.
Lens Correction: Enable (On).
BUT: In the Lens Correction module, you must disable the “TCA” (Transverse Chromatic Aberration) mode or ensure it isn’t actively correcting while the Raw module is already working.
Why the conflict?
If both modules attempt to shift the color fringing (the Raw module initially and the Lens module later), the second module might overcorrect or even undo the first. You might then see new color fringing that wasn’t there before.
In summary:
Yes, use both modules.
The Raw Chromatic Aberration module is the primary tool for correcting color fringing.
In the Lens Correction module, you should only use “Distortion” and “Vignetting”, but disable the “Chromatic Aberration (TCA)” option if you are using the Raw module.