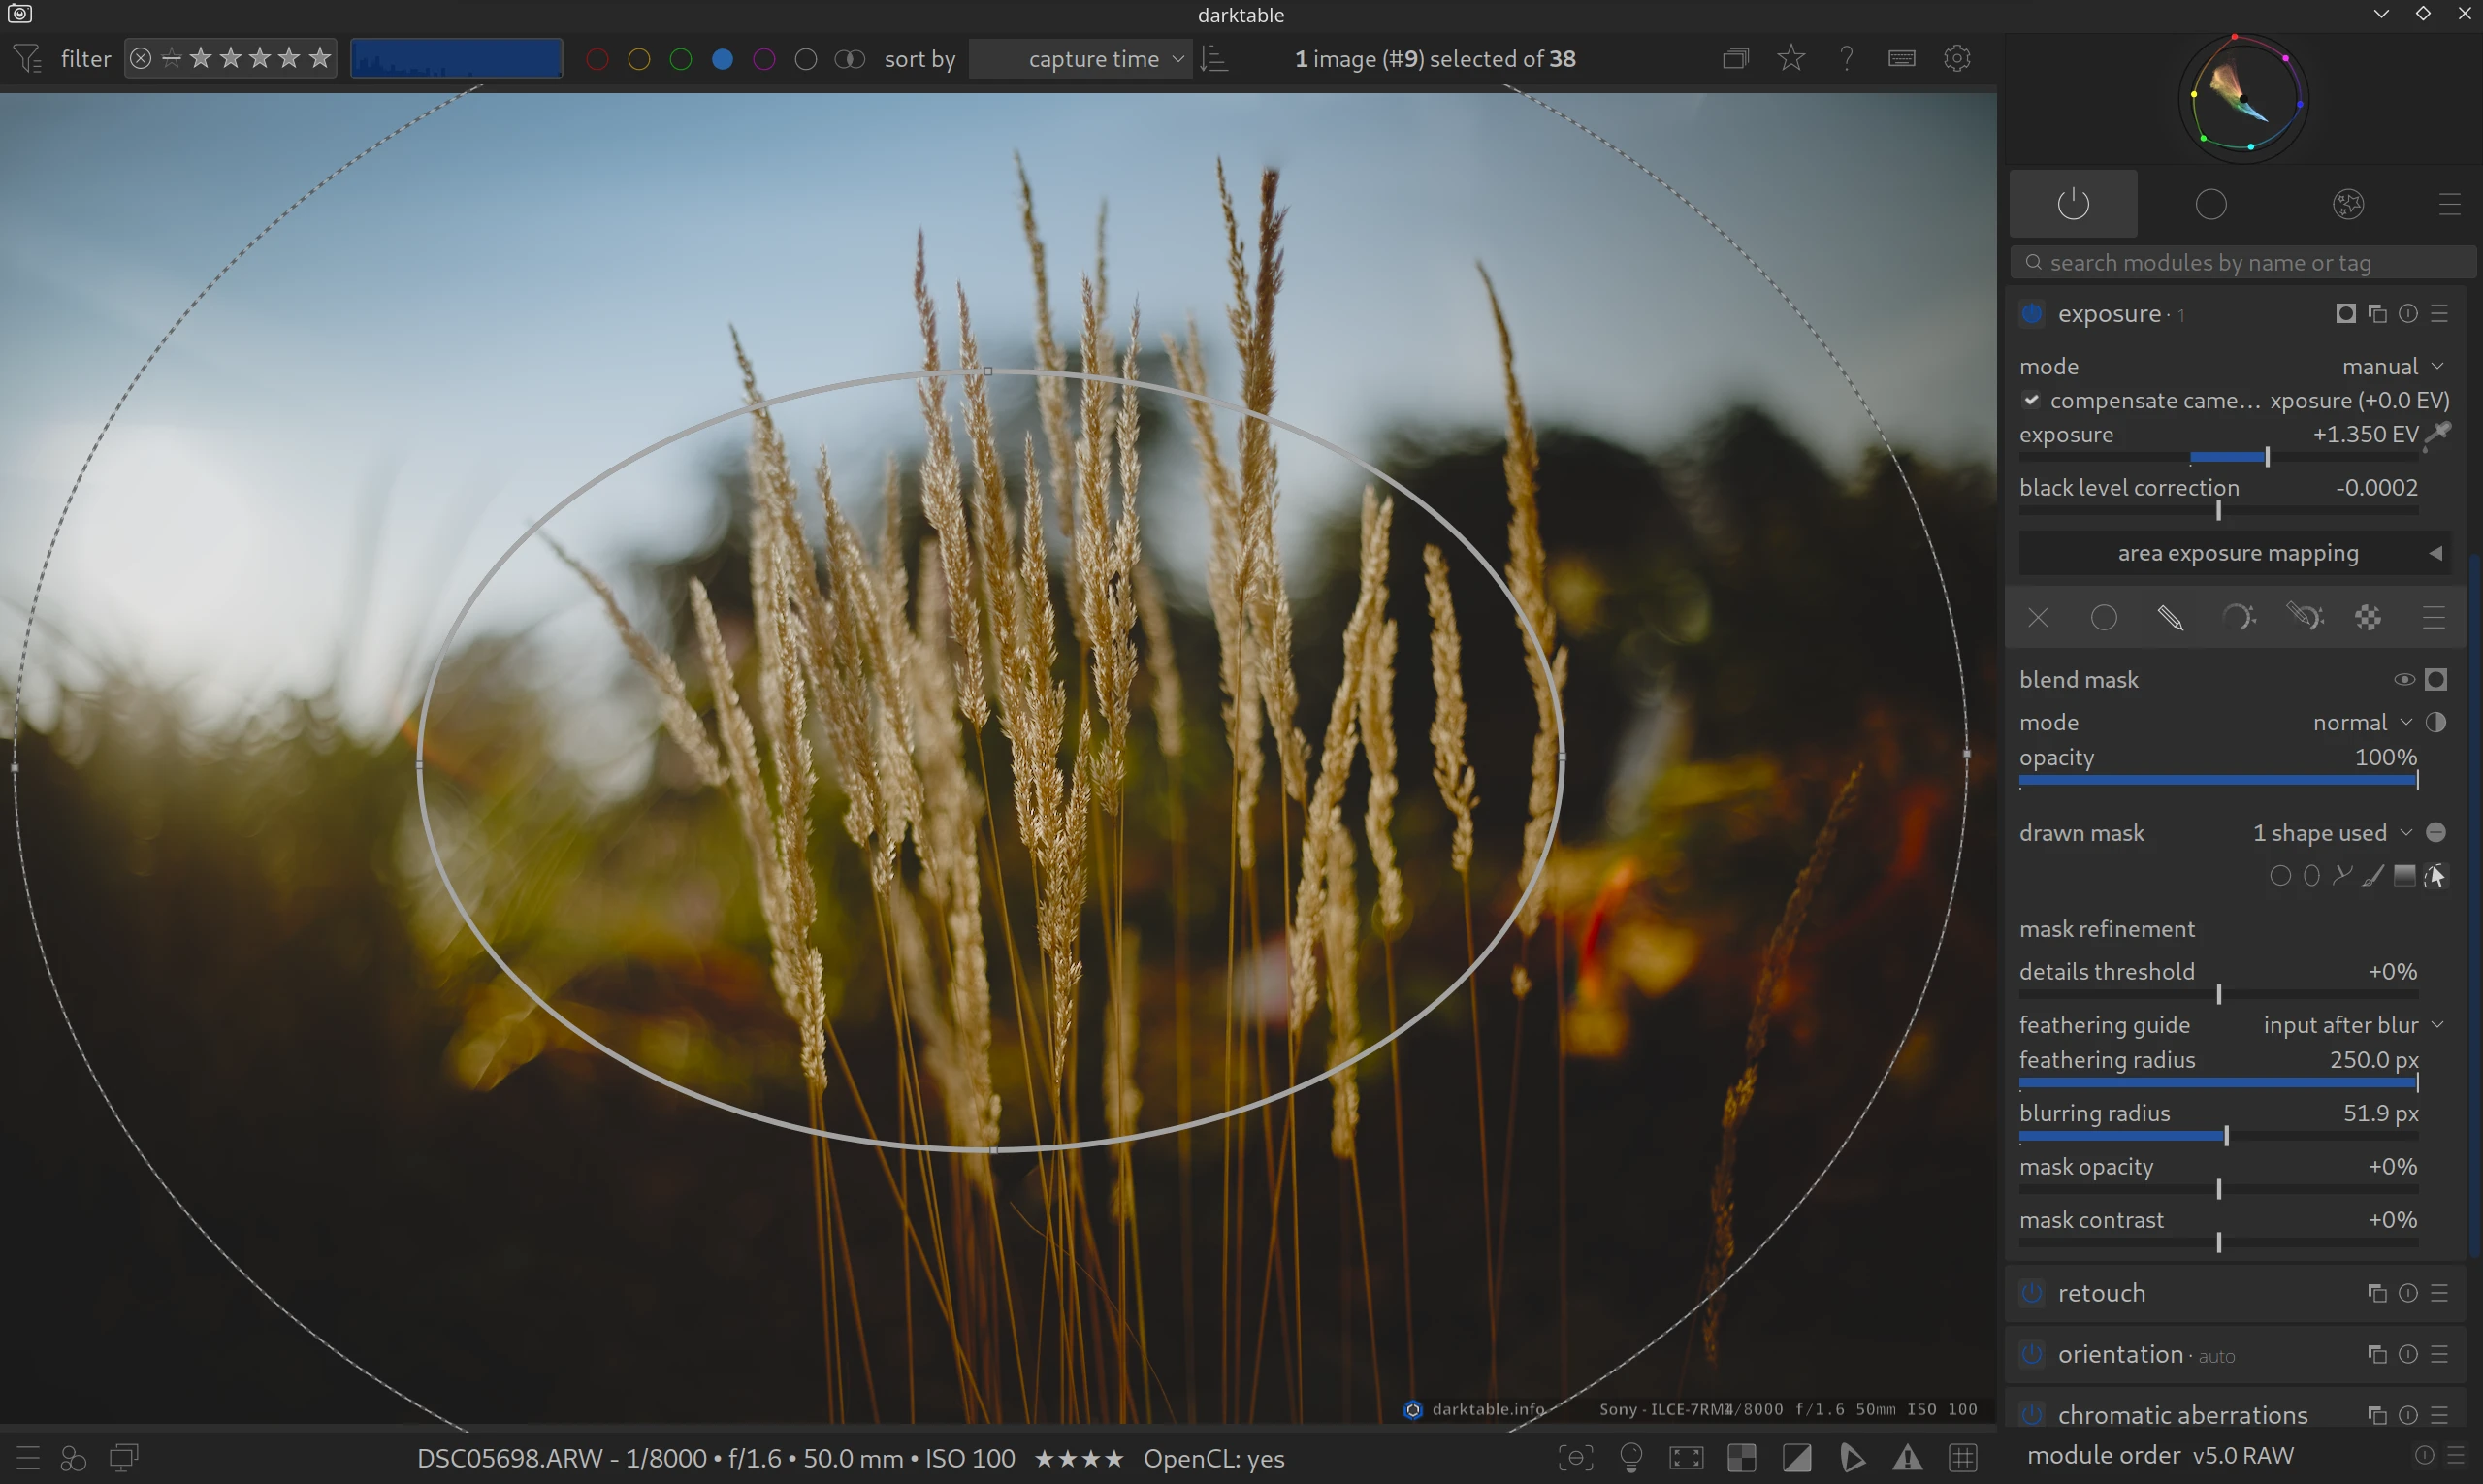
First of all, we believe that Exposure + drawn mask (ellipse) is the simpler and easier alternative.
- You don’t have to learn a new module.
- You can adjust all important settings directly with the mouse.
- Using sliders is not (strictly) necessary.
- You can use the Feathering radius. This is important for obtaining natural transitions.
- Scene-referred
If you still want to try the module, read on.
Guiding the eye.
What is it about?

A vignette is a darkening (or rarely brightening) towards the corners of the image. What used to be a technical flaw of cheap lenses is now a popular stylistic device. Why? Because bright areas attract the human eye. When you darken the edges, the viewer’s gaze automatically wanders to the center of the image to the main subject.
Key features:
- Scale: Determines how far the vignette extends into the image.
- Fall-off strength: Controls how soft the transition from light to dark is.
- Saturation: An often overlooked slider. It allows you to desaturate the colors in the darkened corners, which often looks more natural.
How to use it:
Vignetting is usually one of the last steps in processing.
- Activate the module.
- Move the center of the vignette if necessary, in case your main subject is not exactly in the center.
- Be subtle! A good vignette is “felt” rather than seen at first glance.
EXAMPLE: See our Vignette Examples page that shows both methods with before and after images, as well a zip file to download the original images and XMP sidecar files of how the example edits were made.
You can find more information in the official manual: vignetting
Questions about this topic? Discuss with us in the forum!
January 30, 2026