The Tone Equalizer is your tool for local brightness adjustments. It is the modern, much better replacement for the old “Shadows and Highlights” module.
Its task: Brighten dark areas and darken bright areas without making the image look flat or creating halos (glowing edges). It works similarly to the classic “Dodge & Burn” in the darkroom, but fully automatically based on brightness.

The “Magic”: The Interactive Cursor
Most users who have a hard time with the Tone Equalizer do so because of the many curves and sliders in this module. Yet you almost never have to touch them! The Tone Equalizer is built for operation directly in the image.
Here is how the simple workflow works:
- Activate the module.
- Go to the “Advanced” tab.
- Move the mouse into the image:
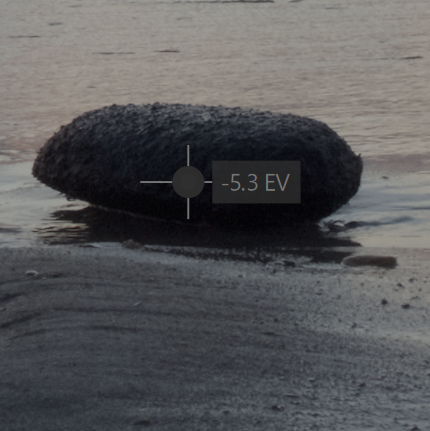
- Point to an area that is too dark (e.g., a shadow on a rock).
- Scroll the mouse wheel: Up to brighten, down to darken.
- You see how the curve in the module adjusts automatically!
- Repeat this for areas that are too bright (e.g., clouds) by pointing there and scrolling the mouse wheel.
The module automatically detects which brightness ranges you have under the mouse and adjusts only those
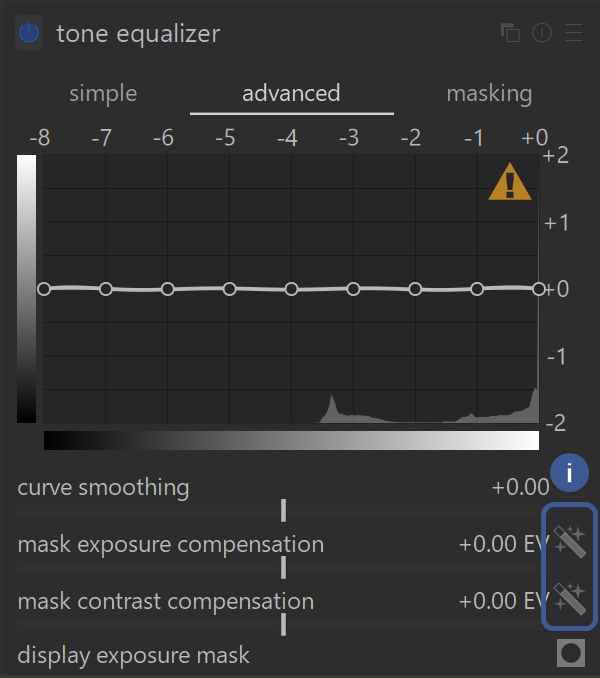
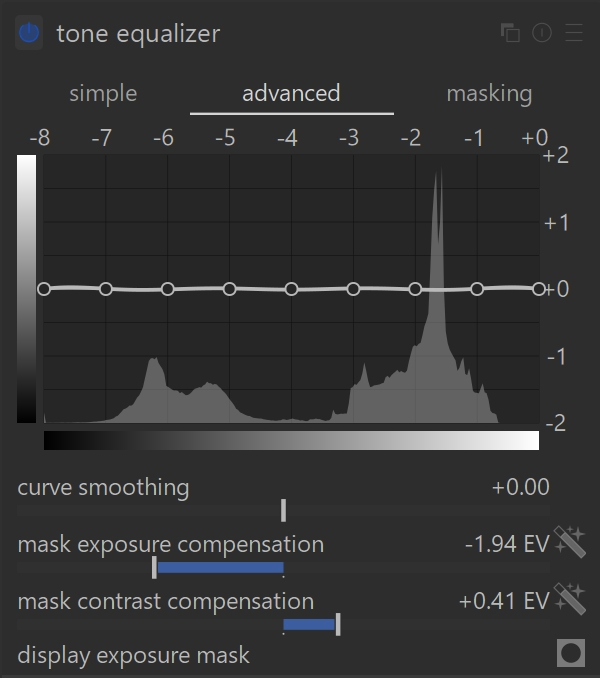
For extreme contrasts (“Advanced” Tab)
Sometimes you have an image with extreme brightness differences (e.g., interior with a view through a sunny window). It can happen that the Tone Equalizer cannot “grab” the very bright or very dark areas.
At such times you will see the histogram off to one side or the other, or you may even see a yellow “warning” triangle on the right side of the Advanced tab. When this happens:
- Mask exposure compensation: While observing the histogram, click on the magic wands to the right of the sliders for:
- Mask exposure compensation, to re-centre the mask’s histogram.
- Mask contrast compensation, to adapt the mask to the contrast range of your image (spread or compress).
- Repeat the operation if the warning sign does not disappear. Or simply move these two sliders in successive attempts until the histogram is centered and evenly distributed across the entire range. You can then modify all brightness areas.
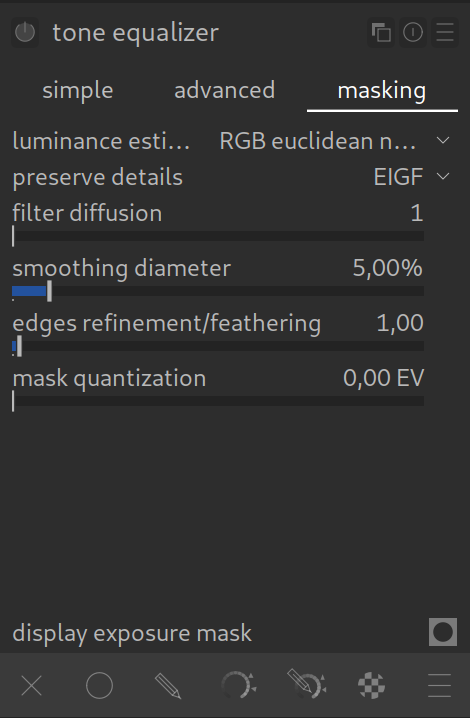
The Mask: When the default is not enough
In the background, the Tone Equalizer automatically creates a mask to separate brightnesses. Usually, this works perfectly “out of the box”. You don’t have to worry about it.
If the image has halos or other odd transitions, go to the “Masking” tab:
- Smoothing diameter: Controls how soft the mask is.
- Larger value: Softer transitions, less local contrast, but less risk of artifacts.
- Smaller value: Preserves more local contrast (“punchier”), but risk of halos increases.
Summary
- Use the Tone Equalizer to brighten the foreground or darken the sky.
- Ignore the sliders – use the interactive cursor and the mouse wheel directly in the image.
- It is the perfect partner for AgX, which takes care of the global contrast, and the Tone Equalizer takes care of the local details.
EXAMPLE: See our Tone Equalizer Example page with before and after images, as well a zip file to download the original example image and XMP sidecar file of how the example edits were made.
For more information, view darktable’s official manual page: “tone equalizer”.
Questions about this topic? Discuss it with us in the forum!
January 30, 2026