Many photographers who want a final image in monochrome capture their image in color, then convert to monochrome during post-processing. Darktable provides many modules that can handle the task. Each method gives you a different level of control: some are quick and simple, while others let you decide exactly how each color becomes a shade of gray through color modules earlier in the pixelpipe.
If you shoot with a dedicated black and white digital camera, or you use your digital camera in Black and White mode, on import, darktable can automatically detect and flag your images as B&W.
Color to Monochrome Conversion Methods (Ranked Best → Least)
The following is a list of 4 ways to convert a color-to-monochrome image using darktable in the scene-referred workflow (and one display-referred method). The list is ordered in what we believe to be the best method, to least favorable. Use the table to jump to the method’s instructions for how to use it.
Comparison Table (Ranked Order)
| Method | Best For | Strengths | Limitations |
|---|---|---|---|
| Color Calibration | High-quality, detailed monochrome | Precise channel mixing; great for skin and texture | Requires more time and understanding |
| Second Color Calibration After AgX | Creative monochrome with upstream color influence | Acts like a display-referred channel mixer with pinpoint control for artistic choices | Not physically accurate; depends on earlier modules |
| Color Balance | Smooth, even monochrome | Easy and predictable | Less control over how colors map to gray |
| Color Equalizer | Hue-specific tonal shaping | Flexible; scene-referred | More complex |
| Monochrome Module | Quick conversion | Simple, intuitive | Display-referred; artifacts |
Color Calibration
What it is:
Color Calibration is a scene-referred module that adjusts how red, green, and blue light from the camera sensor is interpreted. The gray tab lets you mix the R, G, and B channels to create a custom monochrome image with very fine control.
Quick Method:
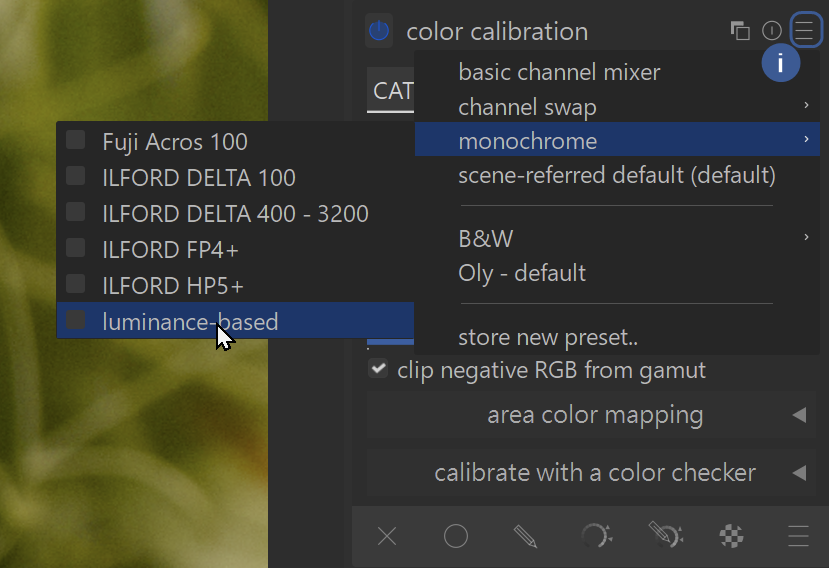
- Open Color Calibration and click the pancake menu in the top right corner of the module.
- Choose the preset monochrome → luminance-based (or choose some other preset for a different look)
Method 2:
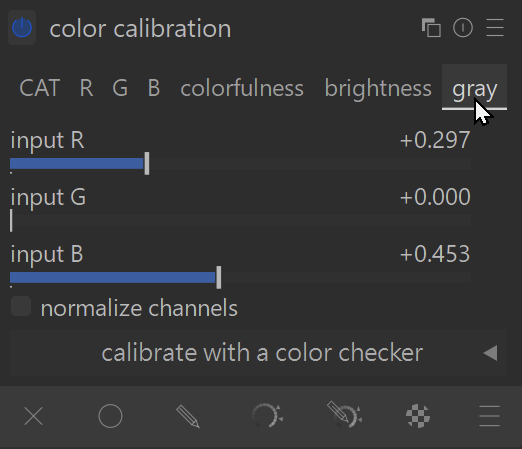
- Open Color Calibration and switch to the gray tab.
- Adjust input R, input G, and input B sliders to mix the channels.
- Increase R for smoother skin; increase G for more detail; lower B to avoid extra texture.
- Make sure the three sliders add up to a non-zero value so the image becomes monochrome.
- Turn on normalize channels if you want the brightness to stay more consistent.
Best for: High-quality, detailed monochrome with full control
Strengths: Precise channel mixing; great for skin tones and texture control
Limitations: Requires more time and understanding
Second Color Calibration Instance (after AgX)
(this is one of our editor’s favorite methods for artistic purposes)
What it is:
Adding a second Color Calibration module after (above) the AgX tone-mapper lets upstream (below in the module list) color tools (Color Equalizer, Color Balance RGB, Color Balance, Color Calibration 1st instance) influence the final monochrome result while keeping AgX’s tone mapping stable.
How to create monochrome:
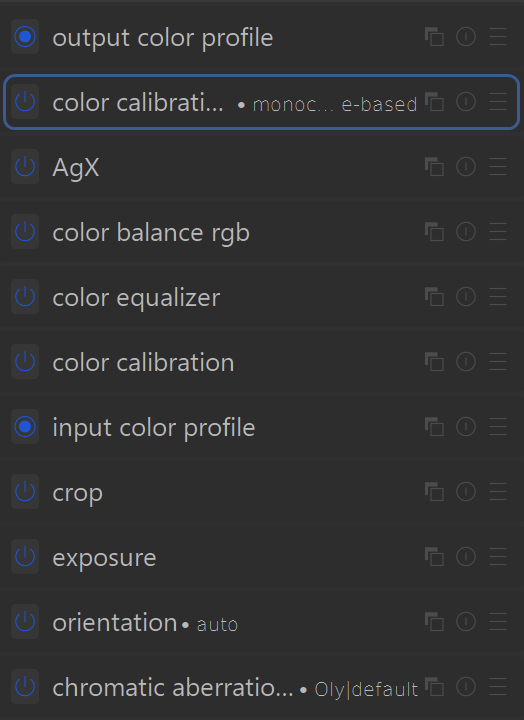
- Add a second instance of Color Calibration.
- Move it after (above) AgX in the pixelpipe by dragging it above the AgX module.
- Choose either method listed above for creating a monochrome image using Color Calibration.
- Add/Manipulate color modules (Color Equalizer, Color Balance RGB, AgX, Color Balance, color calibration 1st instance) to fine-tune how specific hues appear in gray.
Best for: Creative monochrome with upstream color influence
Strengths: Acts like a display-referred “channel mixer”; great for shaping skies, foliage, and skin
Limitations: Not physically accurate; depends heavily on earlier modules
Color Balance
Color Balance is a modern, scene‑referred color‑grading module. It can remove color by lowering saturation, producing a smooth, predictable monochrome result.
Open Color Balance.
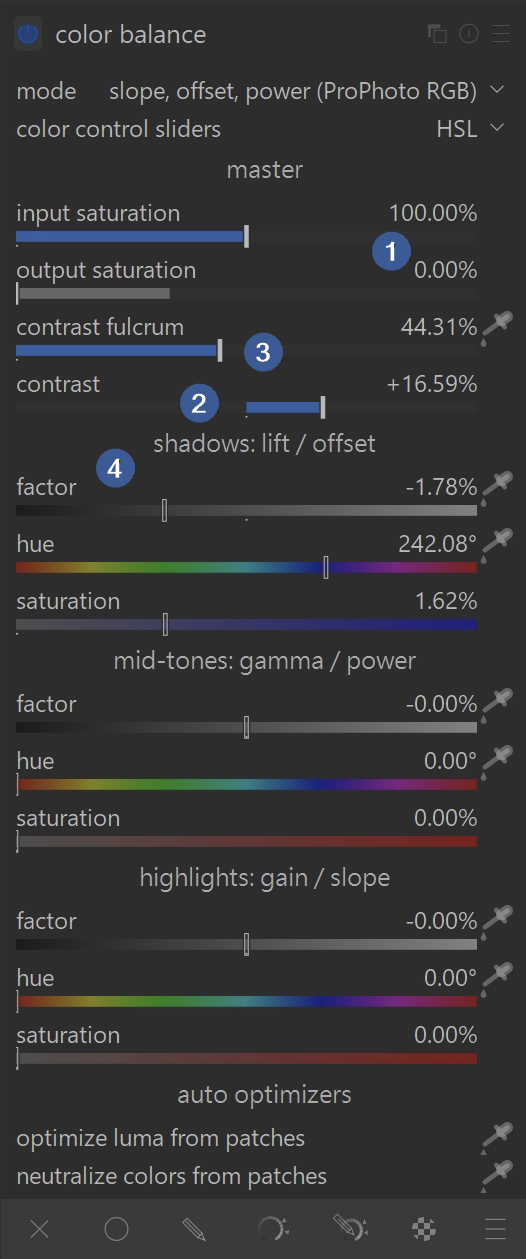
- Lower output saturation to remove color at the end of the module (the slider only goes to 50%, so you have to right-click on the % and type in 0%).
- Adjust contrast
- Adjust contrast fulcrum as desired; adjusting the fulcrum first has no effect until the contrast is adjusted
- Adjust brightness in shadows, mid-tones and/or highlights:
- experiment with the factor, hue and saturation sliders alone or in combination to see what they do to change the contrast/brightness of different regions of your image
TIP: Watch for noise; adjusting the sliders too much may highlight noise
Best for: Smooth, even monochrome conversion
Strengths: Easy to use; predictable; scene‑referred
Limitations: Less control over how specific colors map to gray
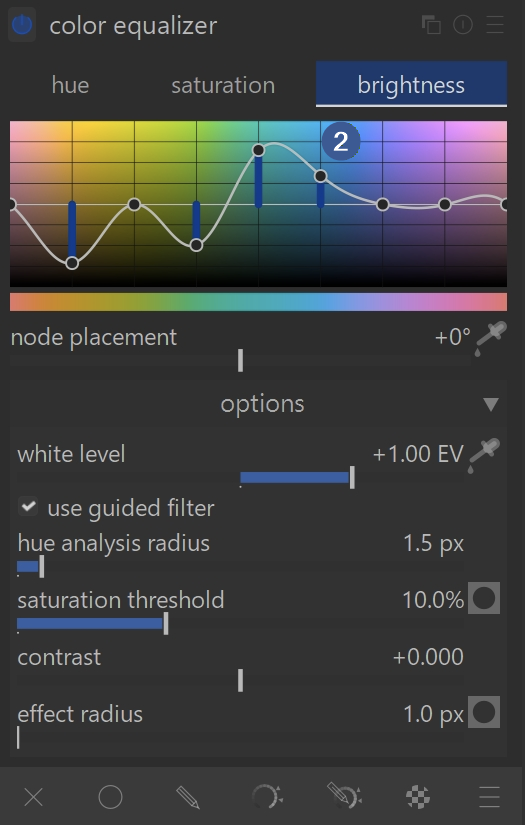
Color Equalizer
What it is:
Color Equalizer is a scene‑referred module that adjusts saturation, luminance, and hue‑based contrast using a multi‑band approach.
Open Color Equalizer.
- In the saturation tab, pull down all nine points of the curve
- Use the brightness tab to brighten or darken specific hues before they become gray.
Best for: Hue‑specific tonal shaping in monochrome
Strengths: Very flexible; scene‑referred; excellent for texture
Limitations: More complex than simple desaturation tools

Monochrome Module
Because this module works in the display-referred workflow, we do not suggest you use it. However, we still provide you with information about it because users typically assume this is the best method since it is an actual module with the name “Monochrome”.
What it is:
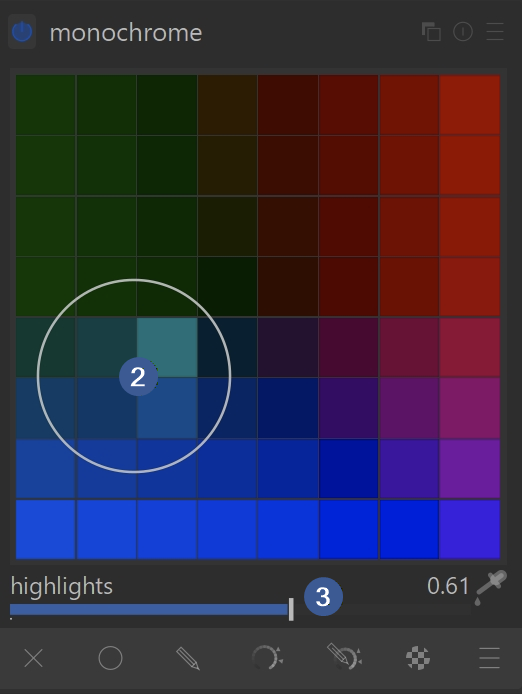
The Monochrome module simulates putting a colored filter in front of a film camera lens. It is fast, simple, and works in a display-referred part of the pipeline.
Open the Monochrome module.
- Move (click + drag) the filter hue control (the circle) to choose which colors brighten or darken different parts of the image.
- ctrl + mouse wheel scroll
- larger circle size includes more hues for a natural look
- smaller circle size to create greater contrast
- highlights – move the slider to the right to increase brightness of highlights; the effect increases the farther the circle is from the center squares
TIP: If you see black pixel artifacts (usually from strong blue light), enable gamut clipping in the input color profile module.
Best for: Quick black & white conversion
Strengths: Simple, intuitive, filter-based control
Limitations: Can create artifacts; less precise; replaced by Color Calibration module

Importing and Flagging Monochrome Images
What it is:
Darktable can automatically detect when an image should be treated as monochrome. This helps the software adjust its processing pipeline, show monochrome-specific controls, and simplify your workflow when working with images that are already black & white or come from a monochrome-converted camera.
How darktable identifies monochrome images:
- If the image was taken with an achromatic camera, darktable automatically flags it as monochrome.
- If your camera was set to a black & white creative mode, the raw file still contains full color data, but the embedded JPEG preview is monochrome. darktable can use this preview to automatically flag the image as monochrome.
- The preview check is disabled by default because it slows down import. You can enable it in:
preferences → processing → detect monochrome previews - When processing a raw file, choosing demosaic → passthrough (monochrome) discards color information and flags the image as monochrome.
- Only use this if the camera’s color filter array has been removed.
- After import, you can manually flag or un-flag an image as monochrome using the metadata tab in the lighttable’s actions on selection module.
What happens when an image is flagged as monochrome:
- darktable applies the tag darktable|mode|monochrome automatically.
- If you use permanent thumbnail overlays, flagged images show a B&W indicator next to the file type.
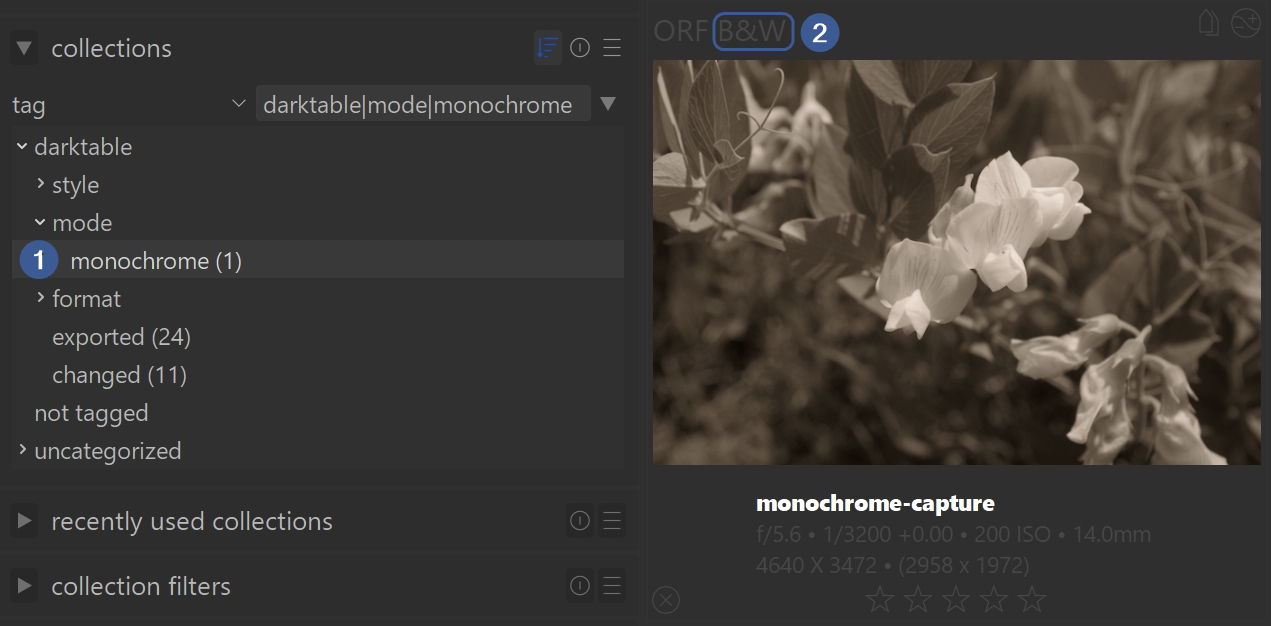

- This makes it easy to filter, sort, or visually identify monochrome images in a collection.
- Some modules—such as demosaic and white balance—are automatically disabled when darktable detects a true monochrome image or one processed with the passthrough monochrome demosaicer.
Best for: Automatically identifying and organizing images that need monochrome processing
Strengths: Helps darktable adjust modules, shows monochrome-specific controls, and simplifies filtering
Limitations: Preview-based detection is slower; passthrough demosaic should only be used on true monochrome-converted camerasThe Result: You get crisp details without the flat background suddenly starting to noise
EXAMPLES: See our Monochrome Image Examples page with before and after images, as well as zip files to download the original example images and XMP sidecar files of how the example edits were made.
For more information, view darktable’s official manual page: “developing monochrome images”.
Questions about this topic? Discuss it with us in the forum!
February 2, 2026