December 26, 2025
After downloading and installing Darktable, it’s time for the first launch. Darktable is powerful, but at first glance, it can also seem overwhelming—and perhaps a bit drab. Many users wonder upon first launching it: “Is this how it’s supposed to look? Everything is gray.”
Don’t worry, this is normal, but we can change it! The following page shows you the most important preferences so that darktable not only looks better, but also helps you achieve faster and better results.
1. Getting comfortable: a customized theme
By default, Darktable often starts in a very neutral gray, which is low-contrast, but confusing for some users. If you’re wondering why the fonts are so small or the buttons are so hard to see: it’s the theme.
Darktable can be completely customized. You can increase contrast, change colors or adjust the font size to make working more enjoyable and easier on your eyes.
- Go to the settings (gear icon).
- Choose the tab “General”.
- Toward the top, to the right of “theme” is a dropdown where you can try different designs (e.g. darktable-elegant-darker for a modern look).
We have put together an overview of customized themes and how they look for you:
Darktable Themes & Preview
2. Getting started: Scene-related workflow
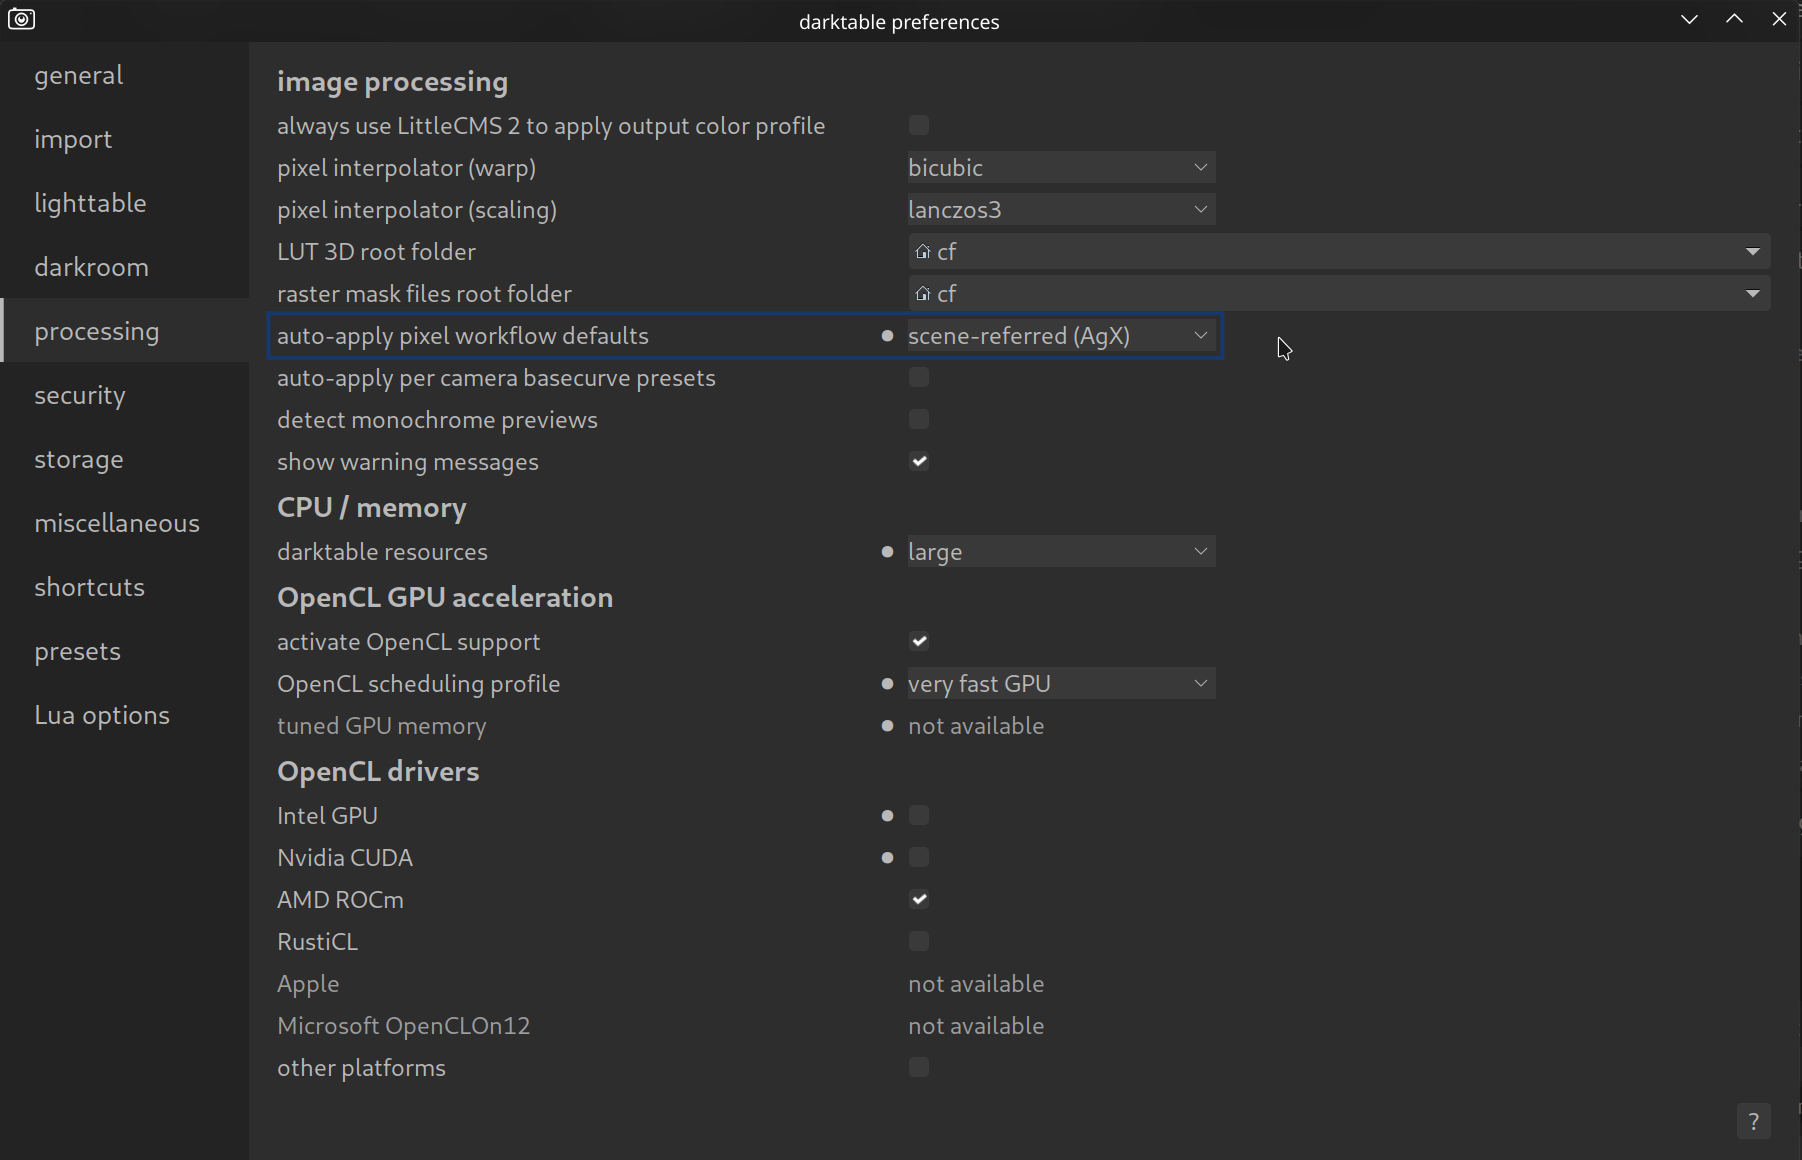
First things first: darktable offers three basic ways of auto-applied workflow defaults: none, display-referred, and scene-referred. There are three scene-referred options: on this site we focus on what we believe is the best, modern processing workflow: scene-referred (AgX).
This is in the default settings under processing > auto apply pixel workflow defaults > scene-referred (AgX).
You can find out why this is so important and how it works here in the manual:
It’s important that it is activated before you begin so you don’t have to worry about it any further.
3. Order in module chaos
Darktable has a large number of modules. Many of them are old or for special cases. In order not to lose track, it is advisable to reduce the view of the modules to the essentials.
We have created a preset (“DT Pro”) that shows you the modules you need for 99% of your images – sorted by workflow and extras.
Module preset (DT Pro)
4. Working faster with shortcuts
Nothing accelerates image processing as much as using keyboard shortcuts. Instead of clicking through menus, you can rate, zoom or access modules with simple keystrokes.
Darktable keyboard layout – Pro
5. Use styles
If you want to apply a specific look to similar images over and over again (e.g. black and white or a specific color scheme), you can save it as a “style” and apply it to similar images with one click. This is a way to turbo-boost your editing.
Styles – Your turbo for the workflow
6. Performance Boost: Activate OpenCL
Darktable can be computationally intensive, especially if you use modern modules like “Diffuse or Sharpen” or “Denoise (profiled)”. If your computer stutters when zooming or the export takes forever, it’s often because darktable is only using the processor (CPU) and ignores your graphics card (GPU).
The solution is called OpenCL. This allows darktable to use the graphics card to help with the calculations. This can, for example, accelerate export by a factor of 10!
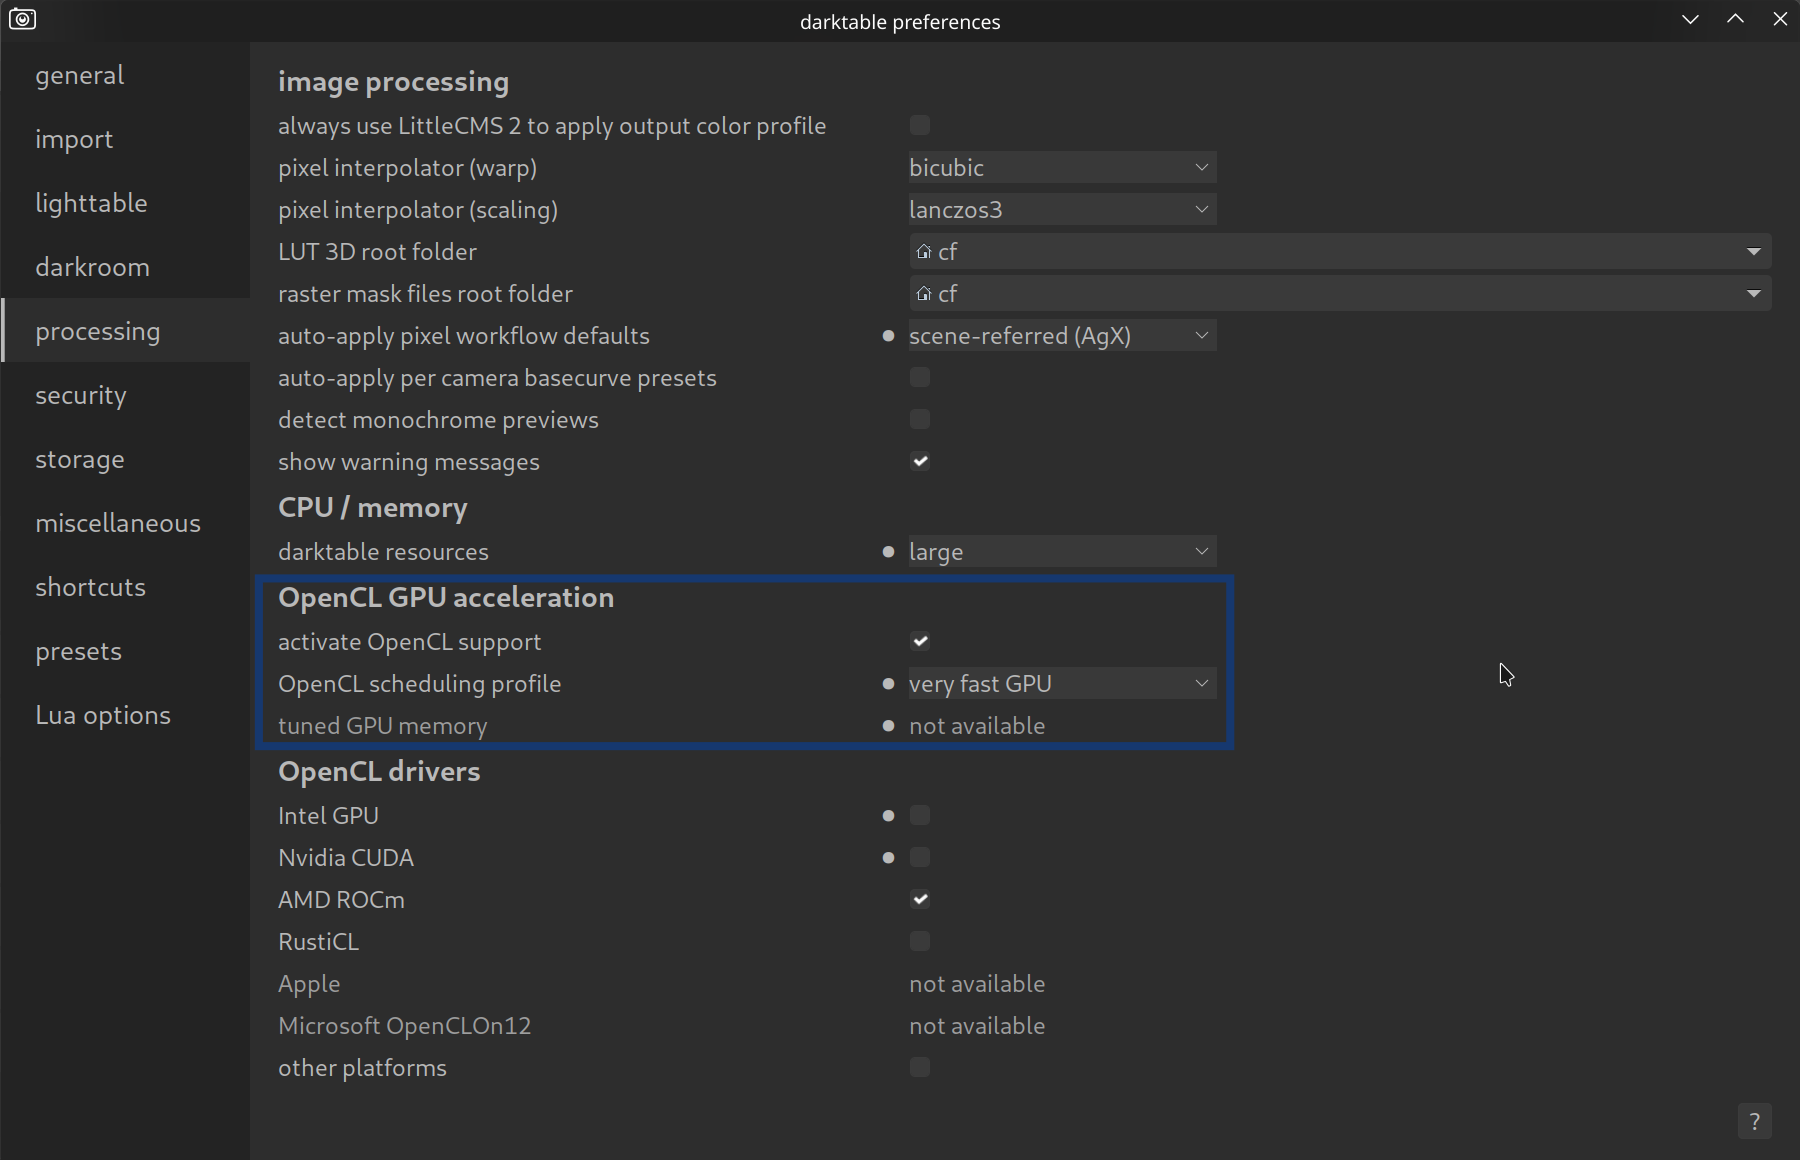
To check if OpenCL is active:
- Go to Settings (gear icon in the top right).
- Choose the tab “processing”.
- Search for the item “activate OpenCL support”.
- Make sure there is a tick here.
Tip: If the option is greyed out, you are probably missing the right drivers for your graphics card. Update your graphics card drivers (Nvidia/AMD) and restart Darktable. At startup, Darktable automatically checks whether the graphics card can be used.