December 6, 2025
What are Presets?
Presets save the current settings of a single module so that they can be quickly applied to other images later.
Access & Creation
- Menu: Click on the hamburger icon (three lines) in the header of a module.
- Save: Select “store new preset…” to save the current slider positions. You must assign a name.
- Apply: Simply select an existing preset from the list in this menu.
Automatic Application (Auto-Apply)
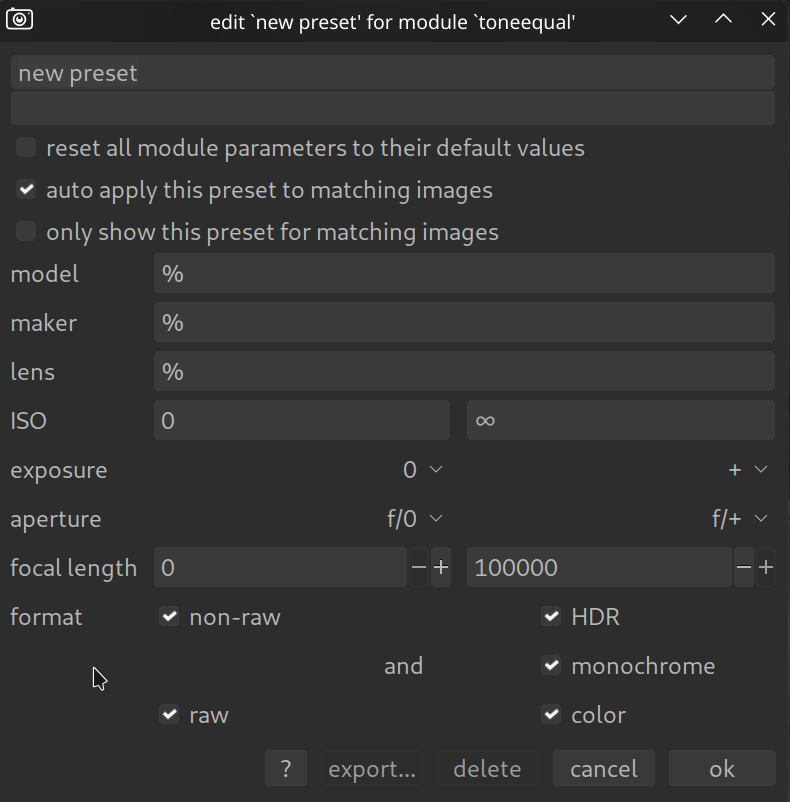
This is the most powerful feature. You can define that a preset is automatically applied to an image if it meets certain criteria.
- Criteria: Camera model, lens, ISO value, exposure time, aperture, focal length, etc.
- Logic: For example, you can create a preset for “High ISO Denoise” that is only applied if the ISO > 1600 and the camera is exactly your model.
- Setup: This is done in the dialog when saving or editing the preset.
Management
- Edit: Click on “edit preset…” in the hamburger menu.
- Global Overview: In the global Darktable preferences (gear icon) under the Presets tab, you will find a list of all presets. There you can delete, edit, or import/export them.
- Visibility: You can hide standard Darktable presets if you don’t use them to keep the list organized.
Tip: The Built-in Module Presets
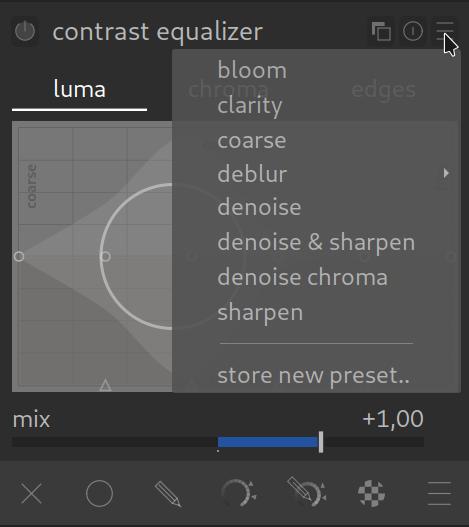
Don’t forget: Almost every module in Darktable already comes with a range of standard presets provided by the developers.
Simply click on the hamburger menu (the icon with the three lines ≡) on the right in the header of the respective module. There you will often find useful starting points or specialized settings for specific situations. This is not only a time saver but also a great way to learn what a module can do by seeing how the developers have set the sliders for certain effects.