December 6, 2025
You have edited your image perfectly. Now it needs to get out of the darkroom to shine on Instagram or be printed.
You can find the “Export” module in the Lighttable on the right side. However, it is also available to you in the Darkroom (there on the left side), in case you want to save an image directly after editing without having to switch views first.
Here are the two most important settings you need to know:
1. For Social Media, Web & Mobile (The Standard)
If you want to show your image on Instagram, WhatsApp, or a website, the goal is: Compatibility.
- Format:
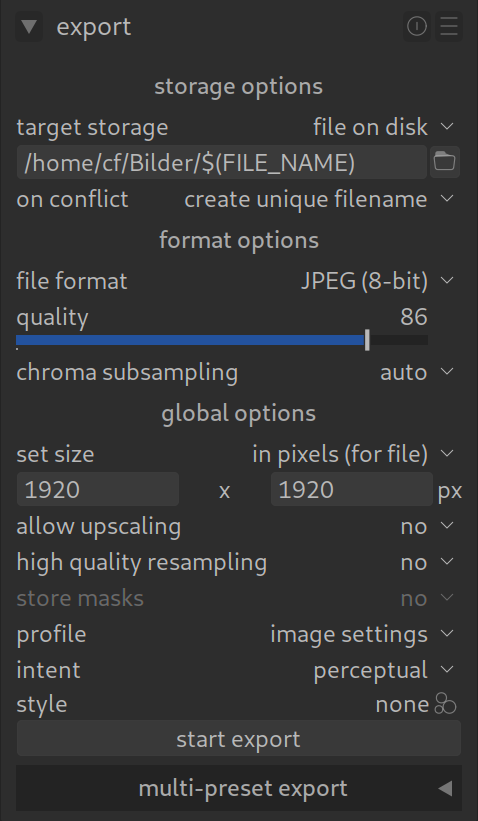
JPEG (8-bit) - Quality:
90-95(100 is unnecessarily large, below 85 artifacts become visible). - Max size: Set e.g.,
2048x2048pixels. This is sharp enough for all mobile phones and saves storage space. - IMPORTANT – Profile: Be sure to select
sRGBfor “Output profile”.- Why? Web browsers and mobile phones expect sRGB. If you choose AdobeRGB here, your colors will look dull and desaturated on the internet!
2. For Print & Archiving
If you want to print the image large or keep it for the future in the best quality.
- Format:
TIFF (16-bit) - Compression:
deflate(lossless). - Size: Leave the fields for size at
0(original size). - Profile: Here you can choose
Adobe RGB(for print shops) orRec2020(for the future) to store more colors.
Pro Tip: “High quality resampling”
When you downscale images (e.g., for the web), activate “High quality resampling” (usually “lanczos3”) in the export settings (sometimes under “Options”). This ensures that the image is automatically slightly sharpened when downscaling and remains crisp.