December 6, 2025
This module is the “Swiss Army Knife” for details. It simulates physical processes (how particles move) to change image structures.
It is the modern replacement for the old Sharpen module and offers significantly higher quality, as it does not create ugly halos (glowing edges).
What can the module do?
It has three main tasks, depending on how you set the sliders:
- Sharpen: Makes details crisp (better than “Unsharp Mask”).
- Diffuse (Blur): Creates a “Bloom” effect or Orton effect (dreamy look).
- Increase Local Contrast: Makes structures more plastic (similar to “Clarity”).
The most important sliders (simply explained)
The module has many sliders, but these four are crucial:
1. Iterations
This is the “engine”.
- Determines how often the effect is calculated.
- High values: Strong effect, but slow calculation time.
- Tip: For simple sharpening, 10-20 iterations are often enough. For strong blur, you need more.
2. Radius (Central Radius)
Determines the size of the details being processed.
- Small radius: Acts on finest details (pores, hair) -> Sharpening.
- Large radius: Acts on coarse shapes -> Local Contrast / Clarity.
3. Speed – The most important slider!
Here you decide what happens (sharpen or blur).
- Positive values (1st order): Diffuse / Blur. The pixels “flow” apart.
- Negative values (1st order): Sharpen. The pixels are “pulled together” (reversing the blur).
4. Edge threshold
The seatbelt.
- Prevents halos from appearing on hard edges.
- If you sharpen and see white borders -> Increase this value.
The Presets (The best way to start)
Since the sliders interact in a physically complex way, it is best to start with the built-in presets (hamburger menu) and then adjust them:
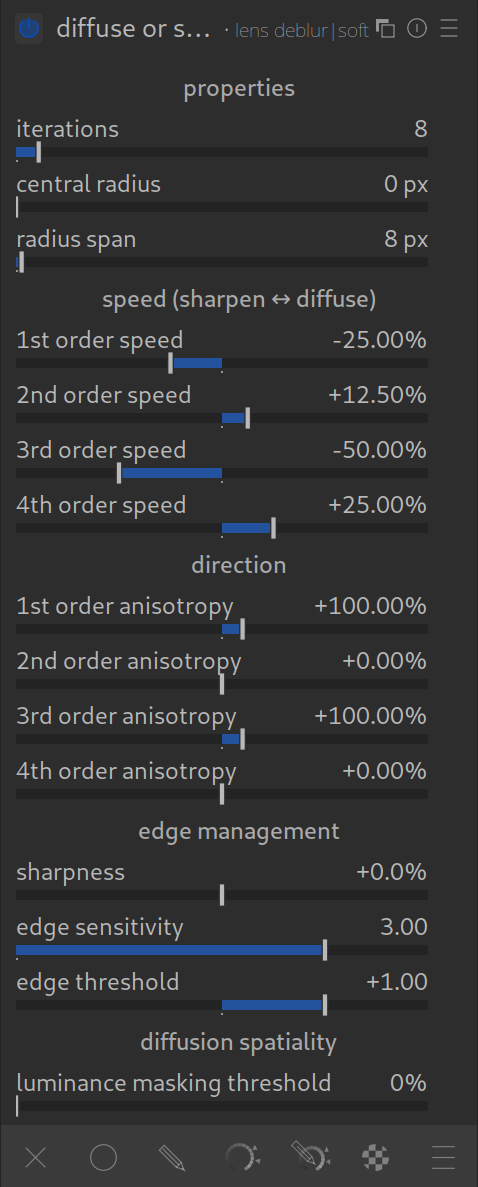
- Lens Deblur:
- The Standard. Use this for almost every image. It corrects the slight blur that every camera lens (and the low-pass filter before the sensor) has.
- Setting: “Hard” is stronger, “Soft” is gentler.
- Add local contrast:
- Makes the image more plastic and “crisp”. Replaces the old “Local Contrast” module.
- Bloom / Blur:
- Creates a glow around bright lights (good for weddings or dreamy landscapes).
Practical Tip: Performance
This module is extremely computationally intensive!
- It can slow down your PC.
- It is best to activate it only at the very end of your editing, when you are done with colors and brightness.
Summary
- Use the preset “Lens Deblur” instead of the old Sharpen module.
- Use negative speed to bring out details.
- Use positive speed to achieve soft, painterly effects.