December 6, 2025
The Standard Workflow Explained with a Practical Example
Often, the camera’s automatic exposure metering orients itself to bright image areas, causing the actual main subject to be captured too darkly. This occurs particularly often with dark subjects (like the black cat here) or in backlit situations.
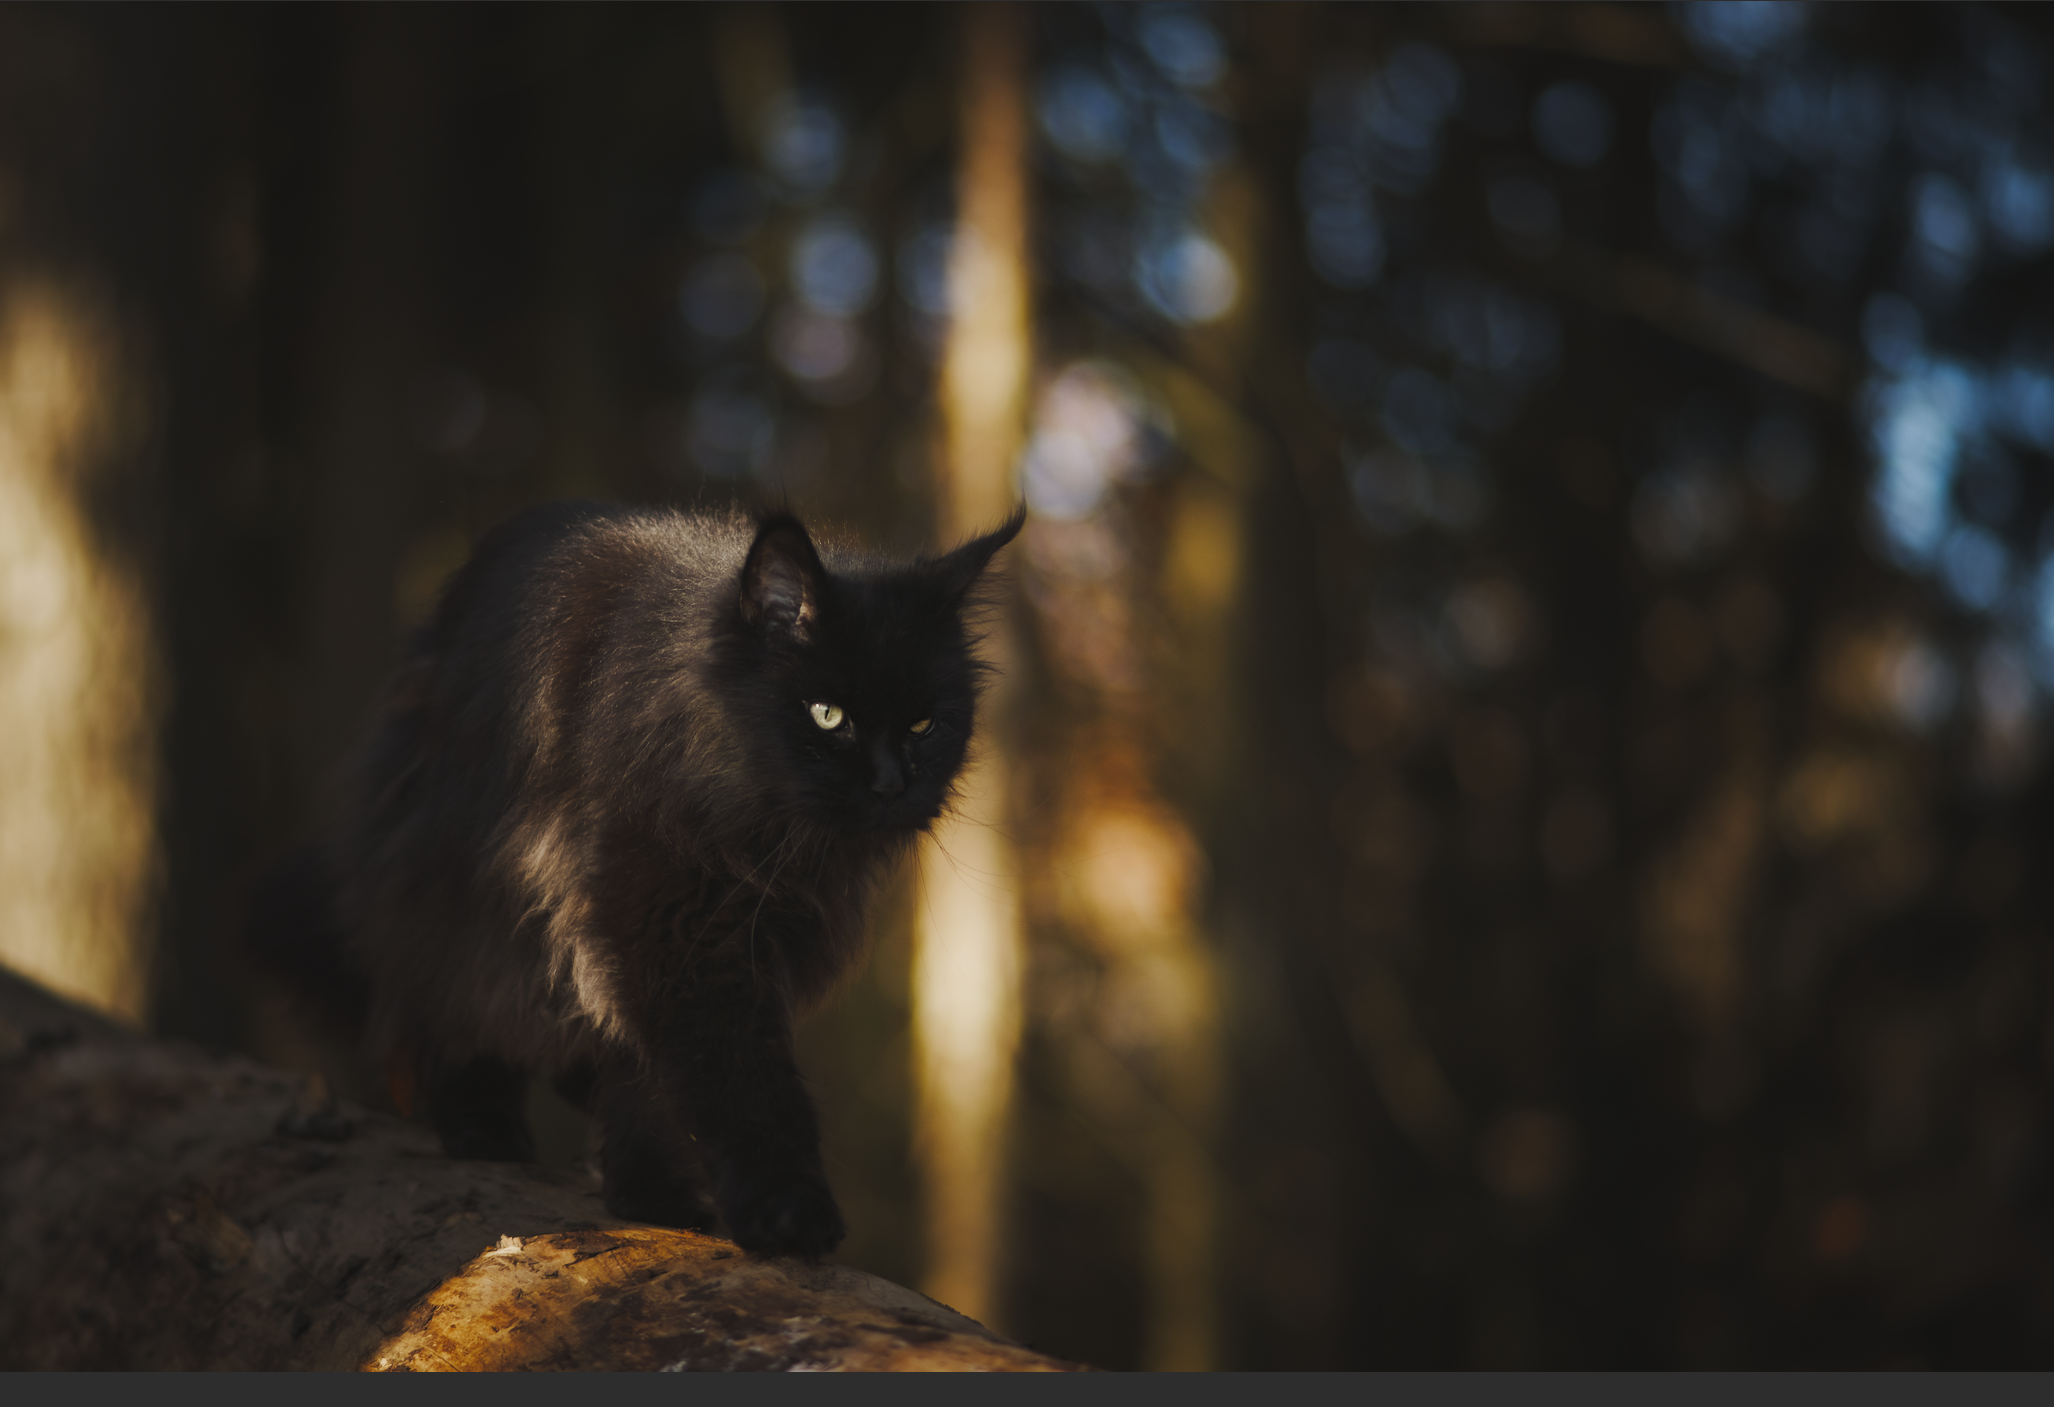
Initial Situation
The RAW image is underexposed. Only the bright light reflections on the tree trunk and in the background are correctly exposed, while the main subject shows little detail. However, since it is a RAW file, this image information is present and can be reconstructed.

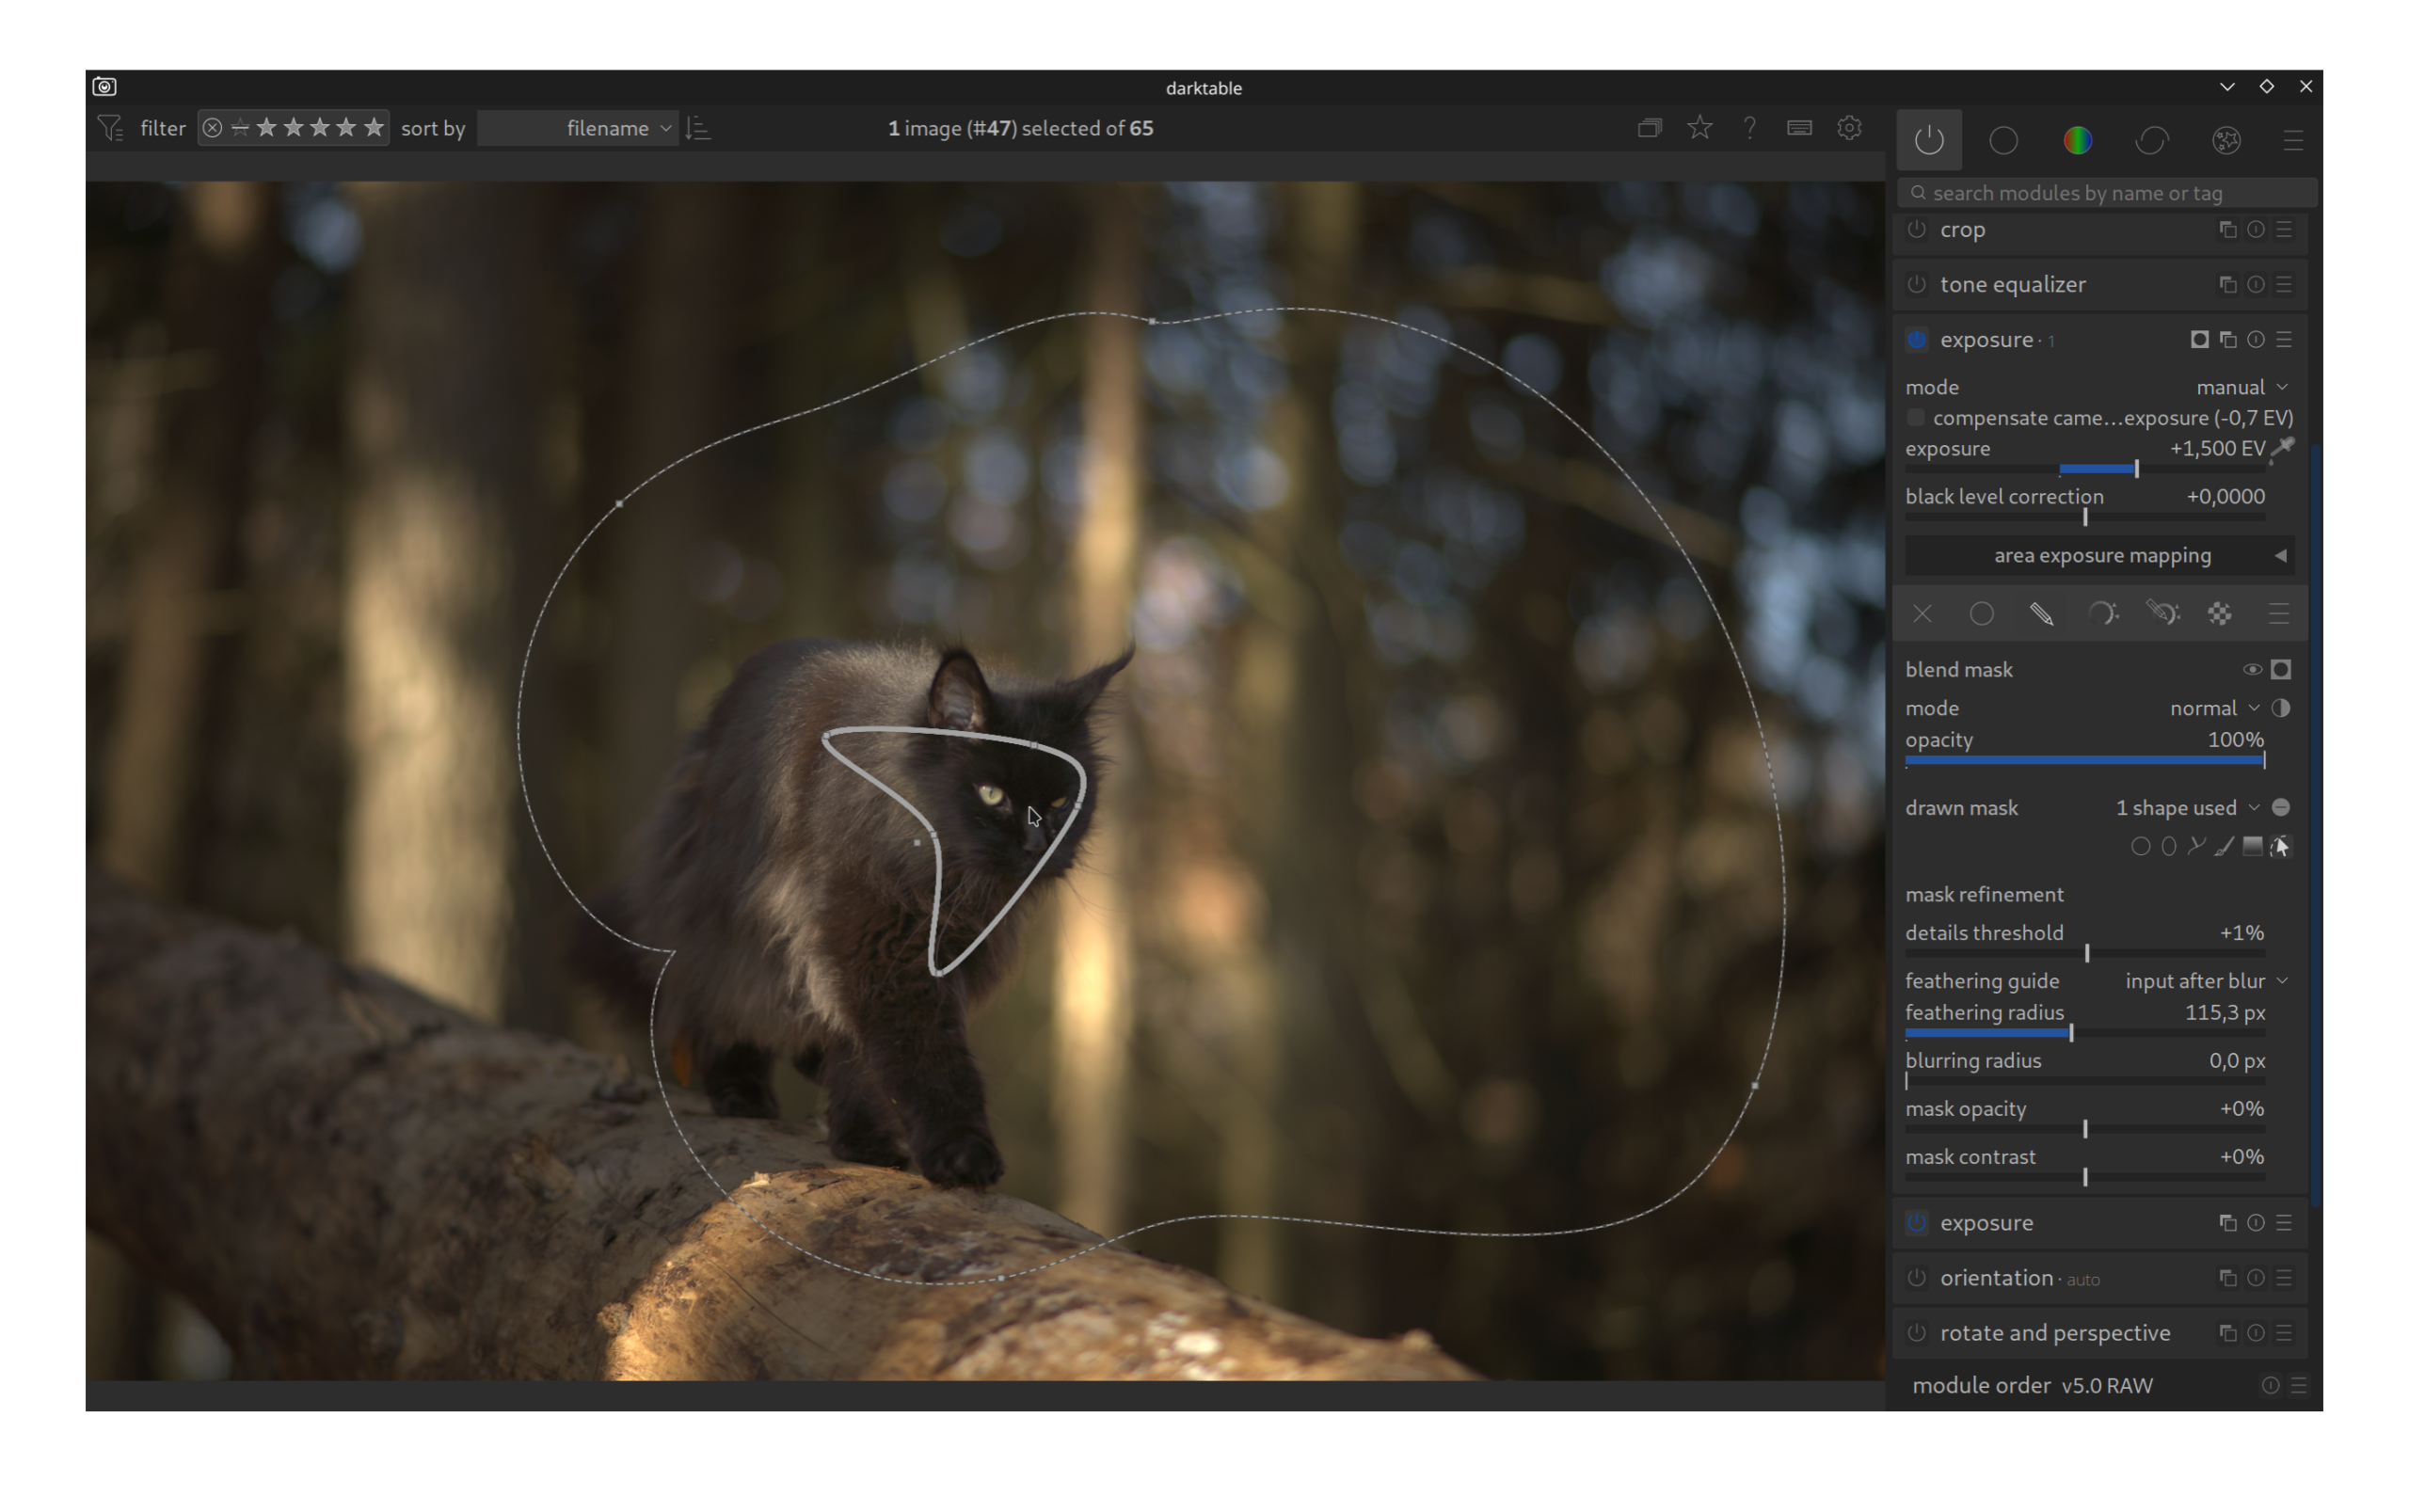
Step 1: Exposure
In the first step, the global brightness of the image is corrected.
Global Adjustment: First, the exposure is raised enough so that the midtones of the image appear correct.
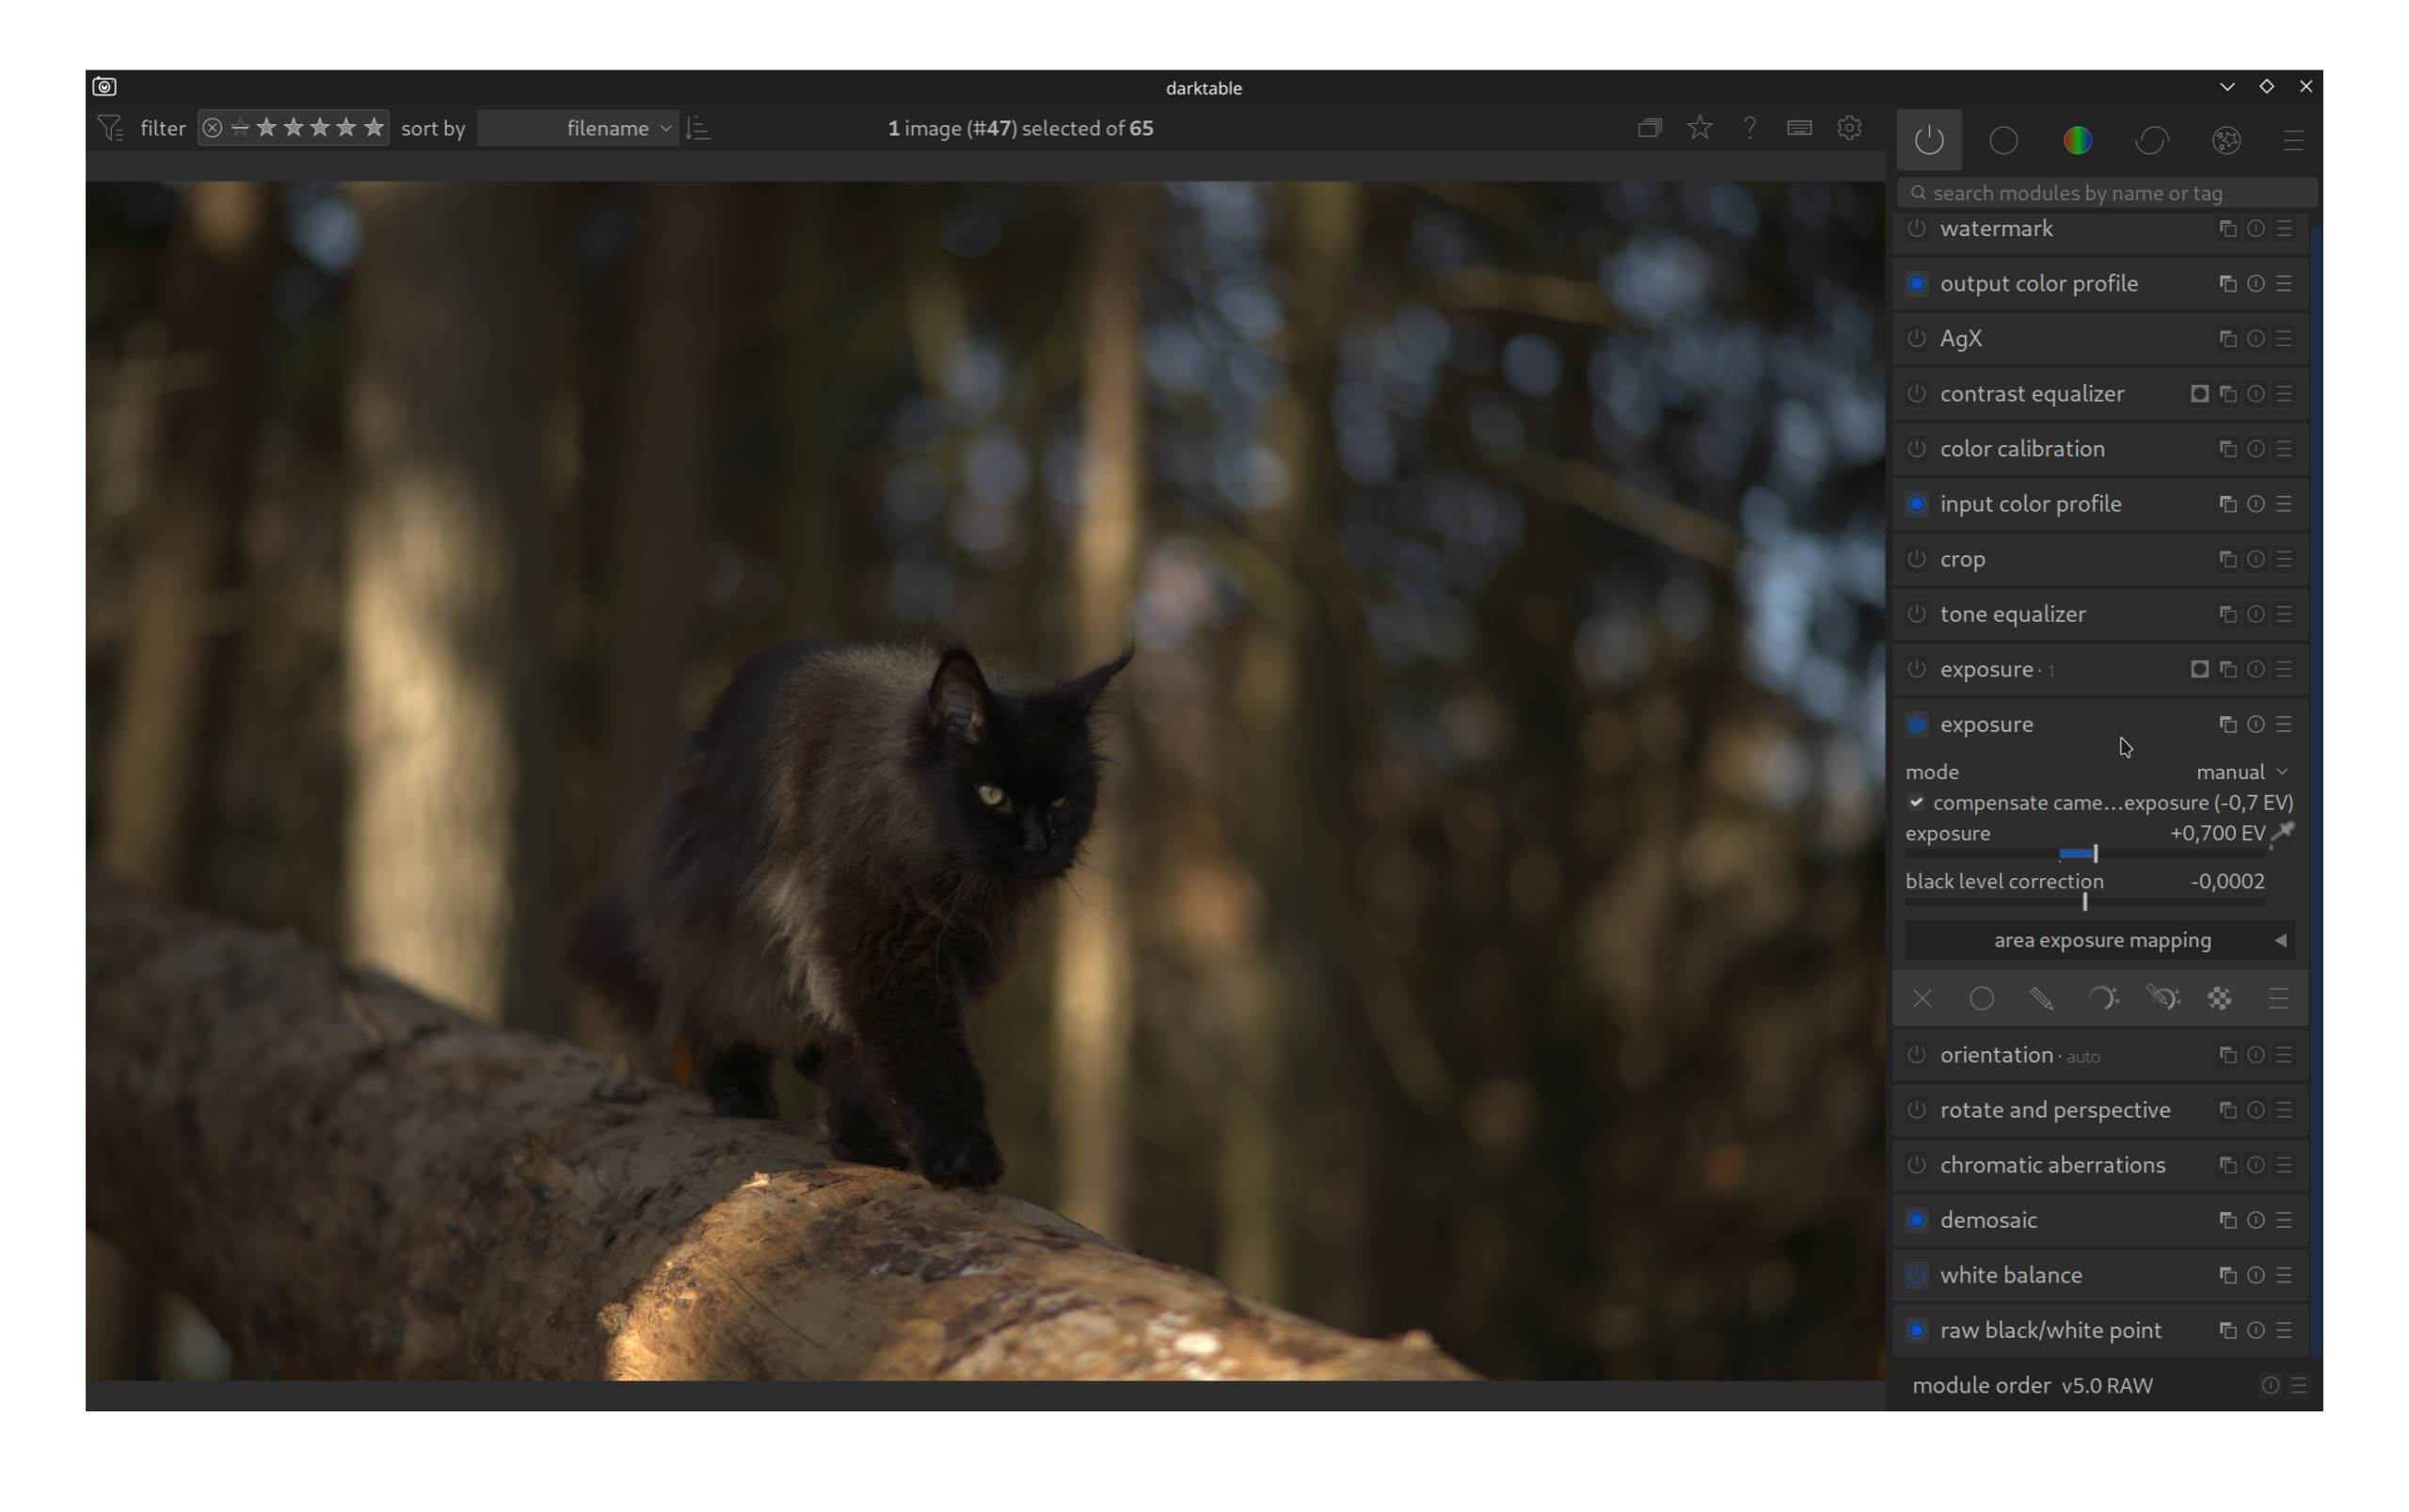
Local Adjustment (Mask): Since a global brightening would cause the bright background to be blown out, we use a second instance of the Exposure module. With a soft, drawn mask, only the area of the cat and the tree trunk is selectively brightened. This immediately directs the visual focus to the main subject.
Step 2: Color Calibration
This module primarily serves to correctly set the white balance within the modern workflow.
Application: In this case, the camera has already hit the white balance satisfactorily. The lighting mood looks natural, which is why no further corrections are necessary here. The module remains on the default settings (or adopts the values “as shot”).
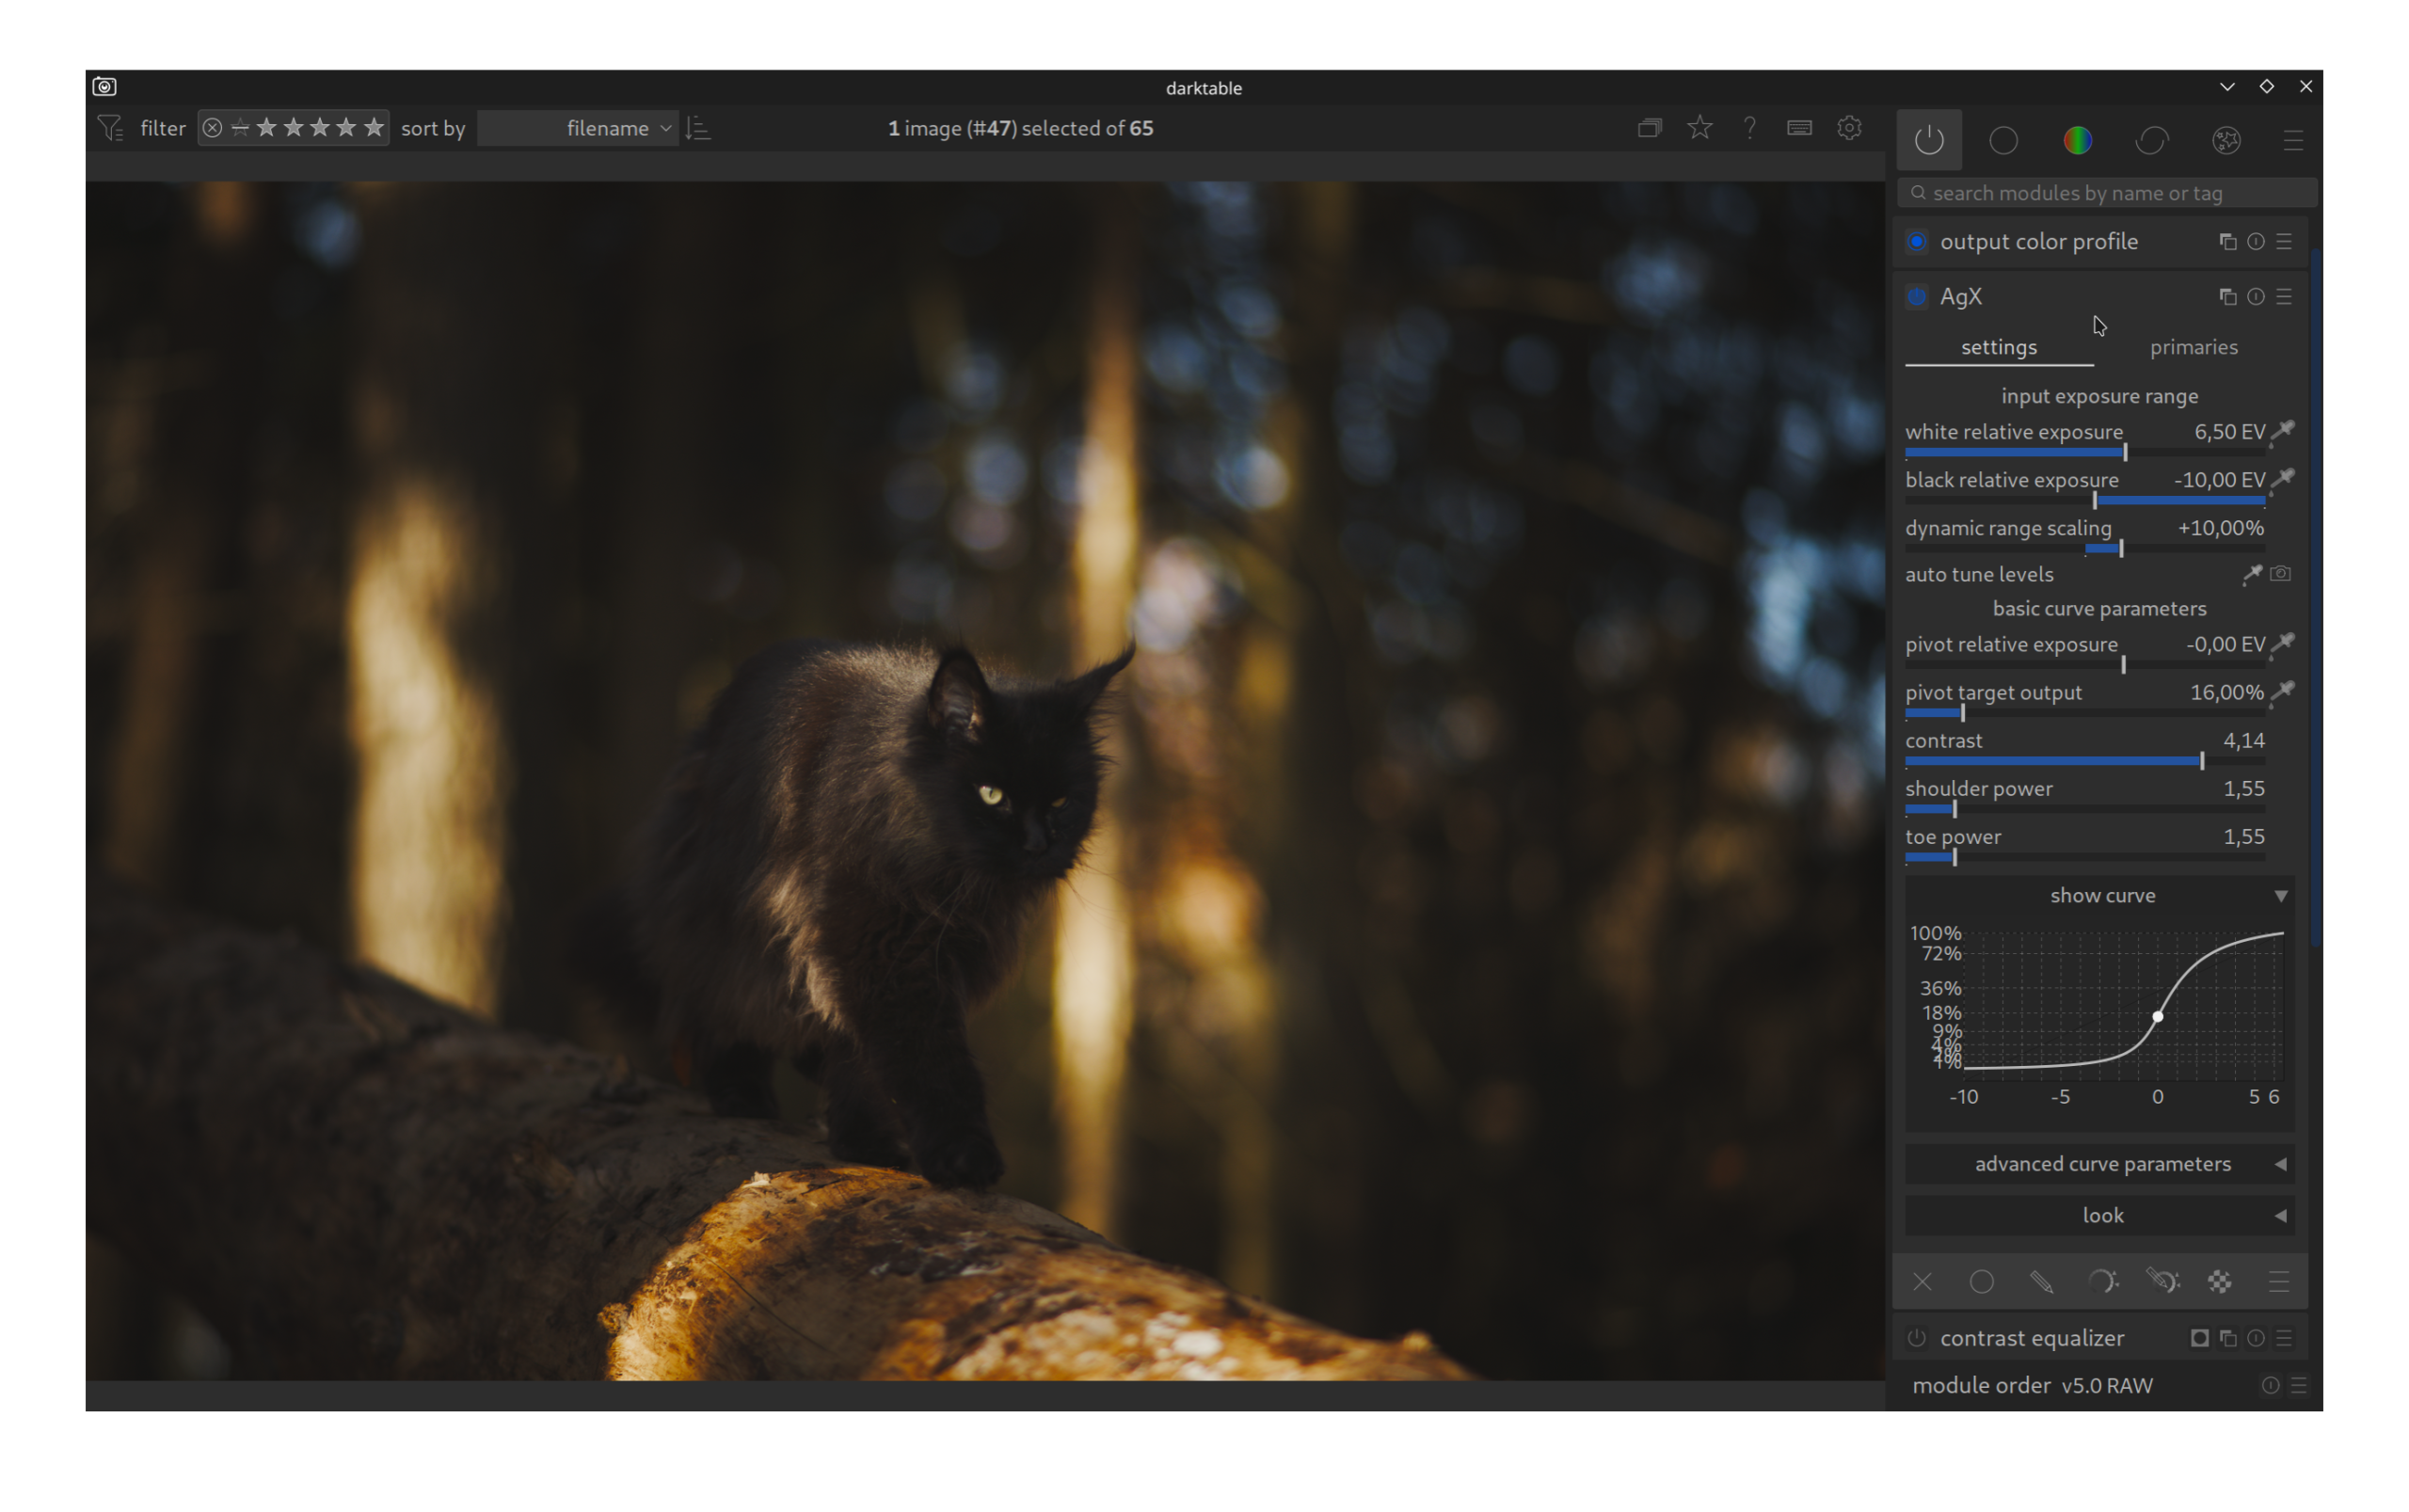
Step 3: AgX (or Sigmoid/Filmic)
Here, tone mapping takes place, i.e., the compression of the dynamic range to the displayable range of the monitor.
Application: The module ensures that the very bright lights (highlights) created by the exposure correction are rolled off gently and do not “clip” hard (blow out to white). At the same time, the contrast in the shadow areas is controlled to avoid a flat image.
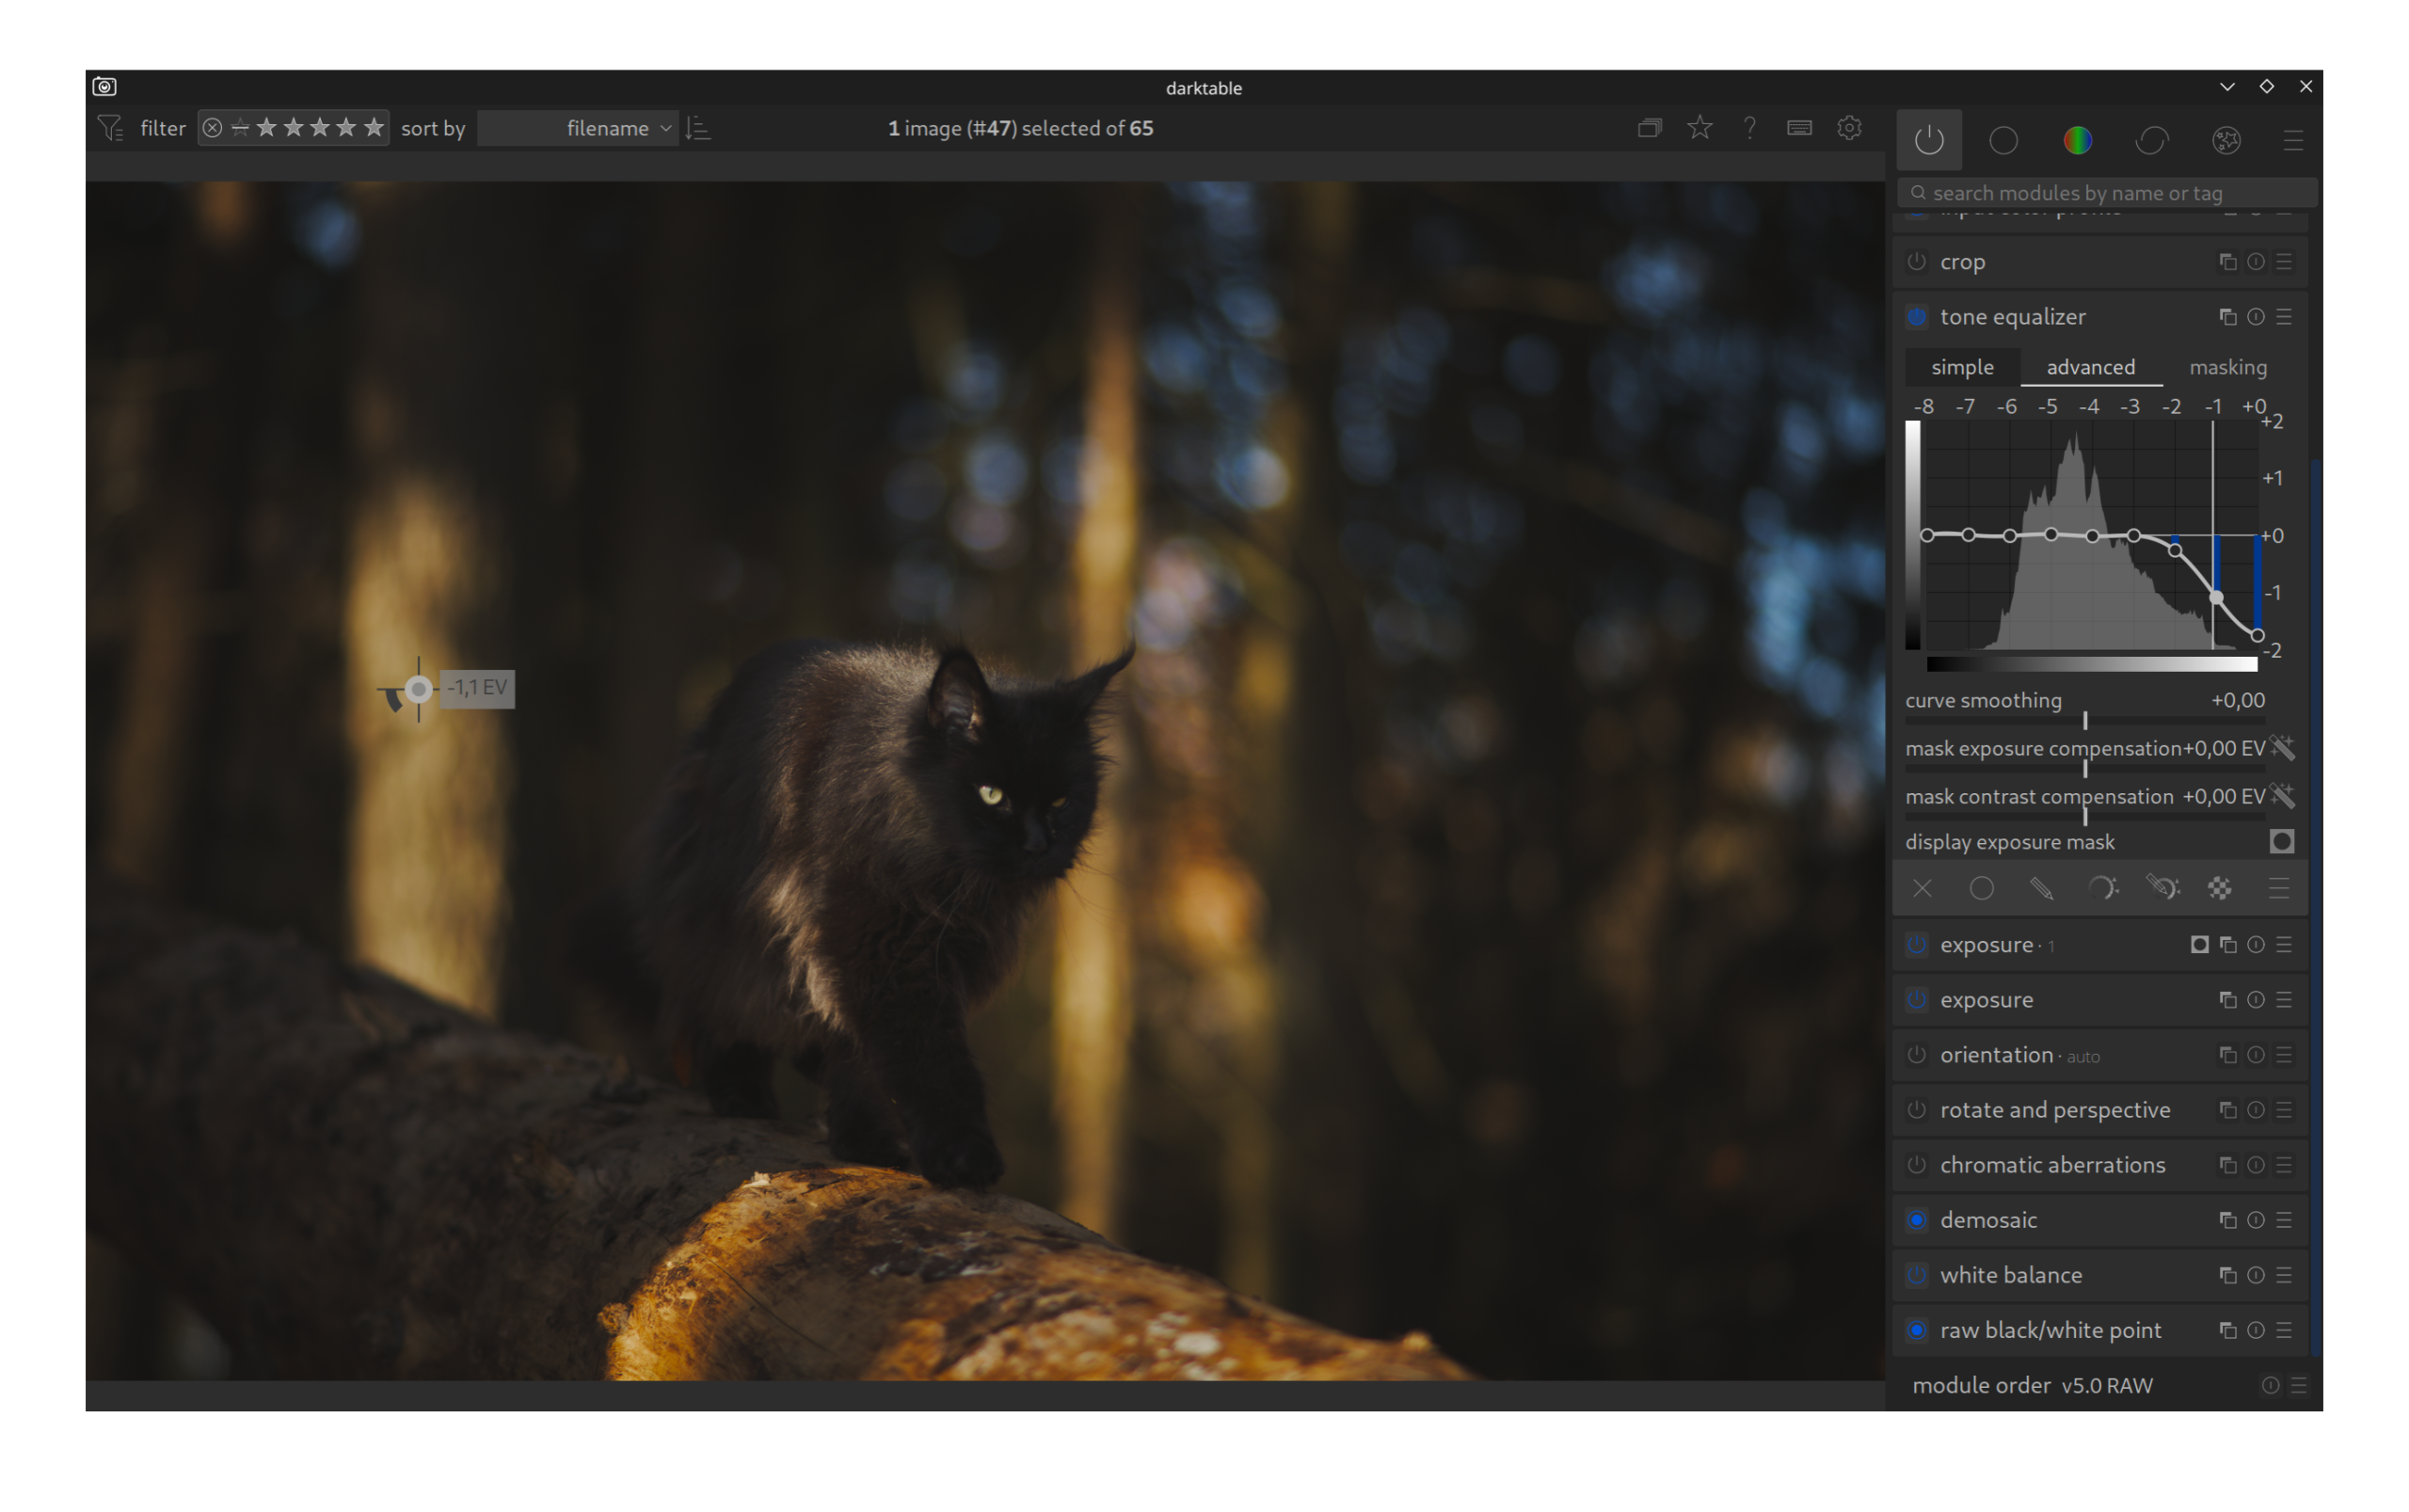
Step 4: Tone Equalizer
The Tone Equalizer is a powerful tool for local contrast adjustments (“Dodge & Burn”) without having to draw masks.
Problem: There are bright areas in the background and foreground that distract from the main subject.
Solution: With the Tone Equalizer, the brightest areas of the image (highlights) are selectively darkened. As a result, the background visually recedes, and the viewer’s attention remains on the cat.
Step 5: Color Balance RGB
This module is responsible for saturation and creative color grading.
Application: Since we are aiming for a natural look and the colors of the forest are already coherent, no strong manipulation is necessary in this example. The image benefits from the natural coloring, which is why we skip this step or make only minimal adjustments to the global saturation.
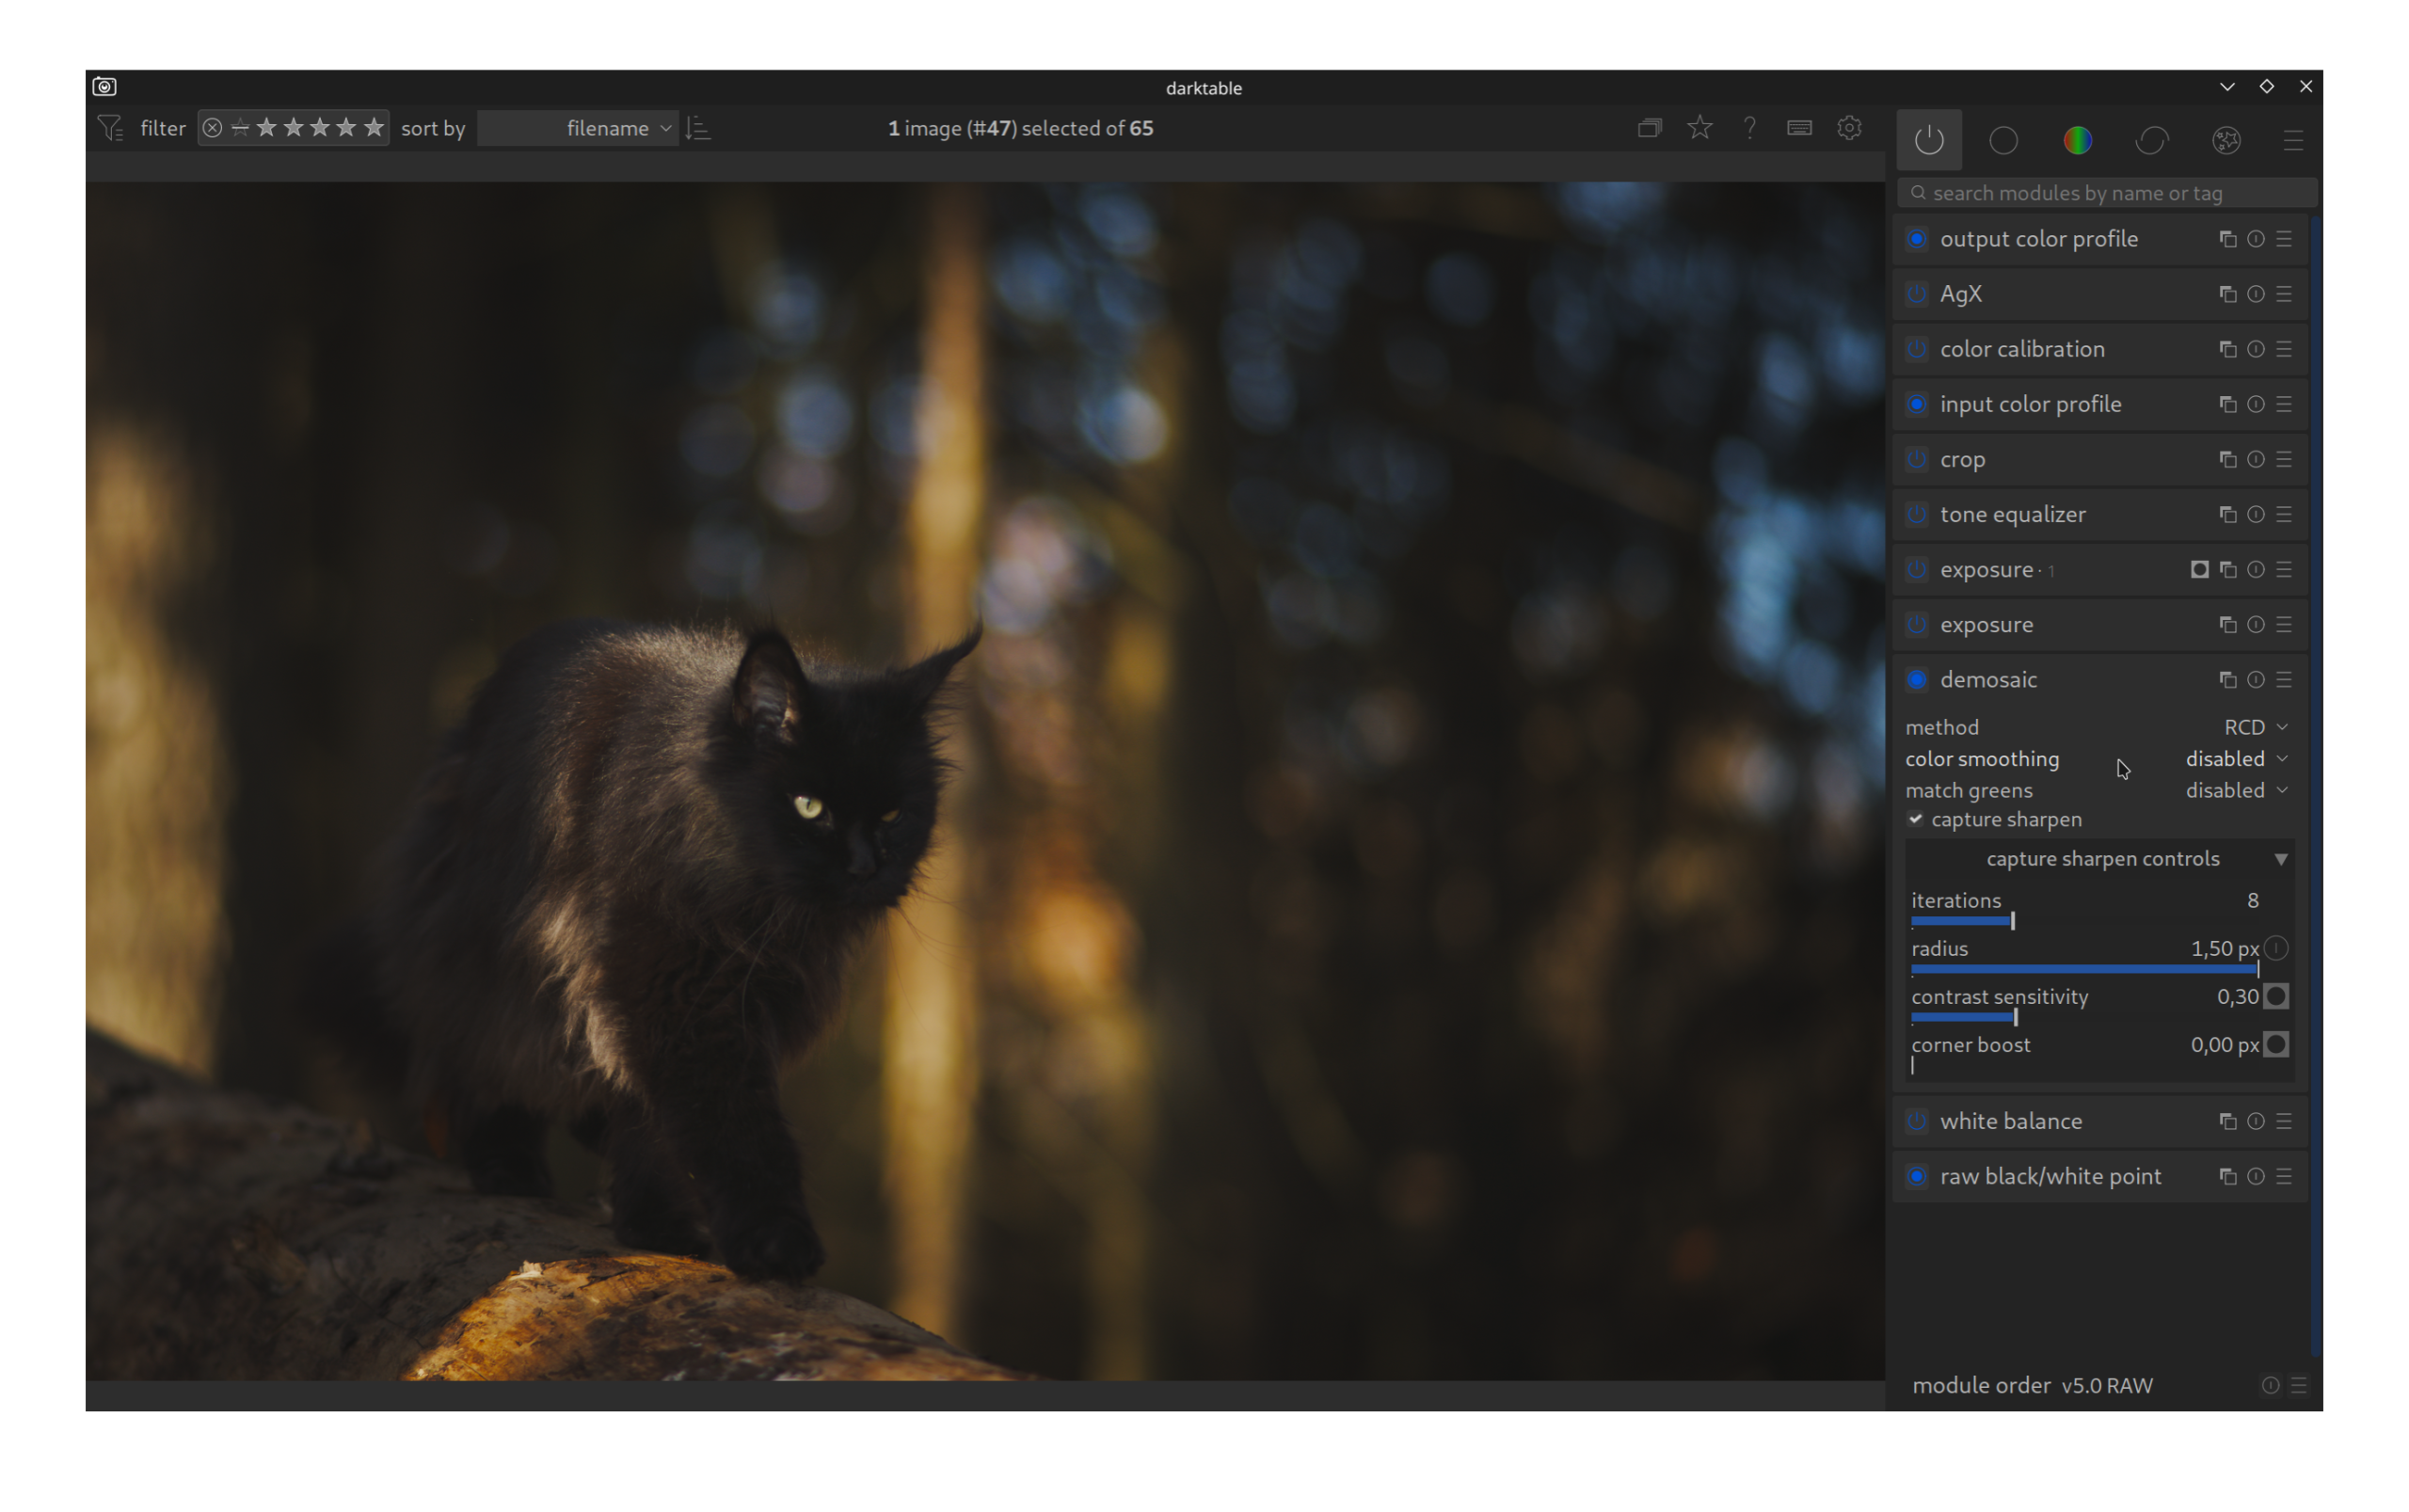
Optional: Sharpness & Details
After exposure and color are correct, it’s time for the details.
The Basis: Capture Sharpening (New from Darktable 5.4)
This removes the slight blur of the camera sensor directly at the source. It is the cleanest and fastest way to basic sharpness. Make this the standard!
Contrast Equalizer
In animal portraits, the focus is ideally on the eyes. In this shot, the focus point was not hit perfectly.
Solution: With the Contrast Equalizer, we increase the local contrasts. This strengthens the structure in the fur and makes the eyes appear clearer and sharper, which gives the image more depth.
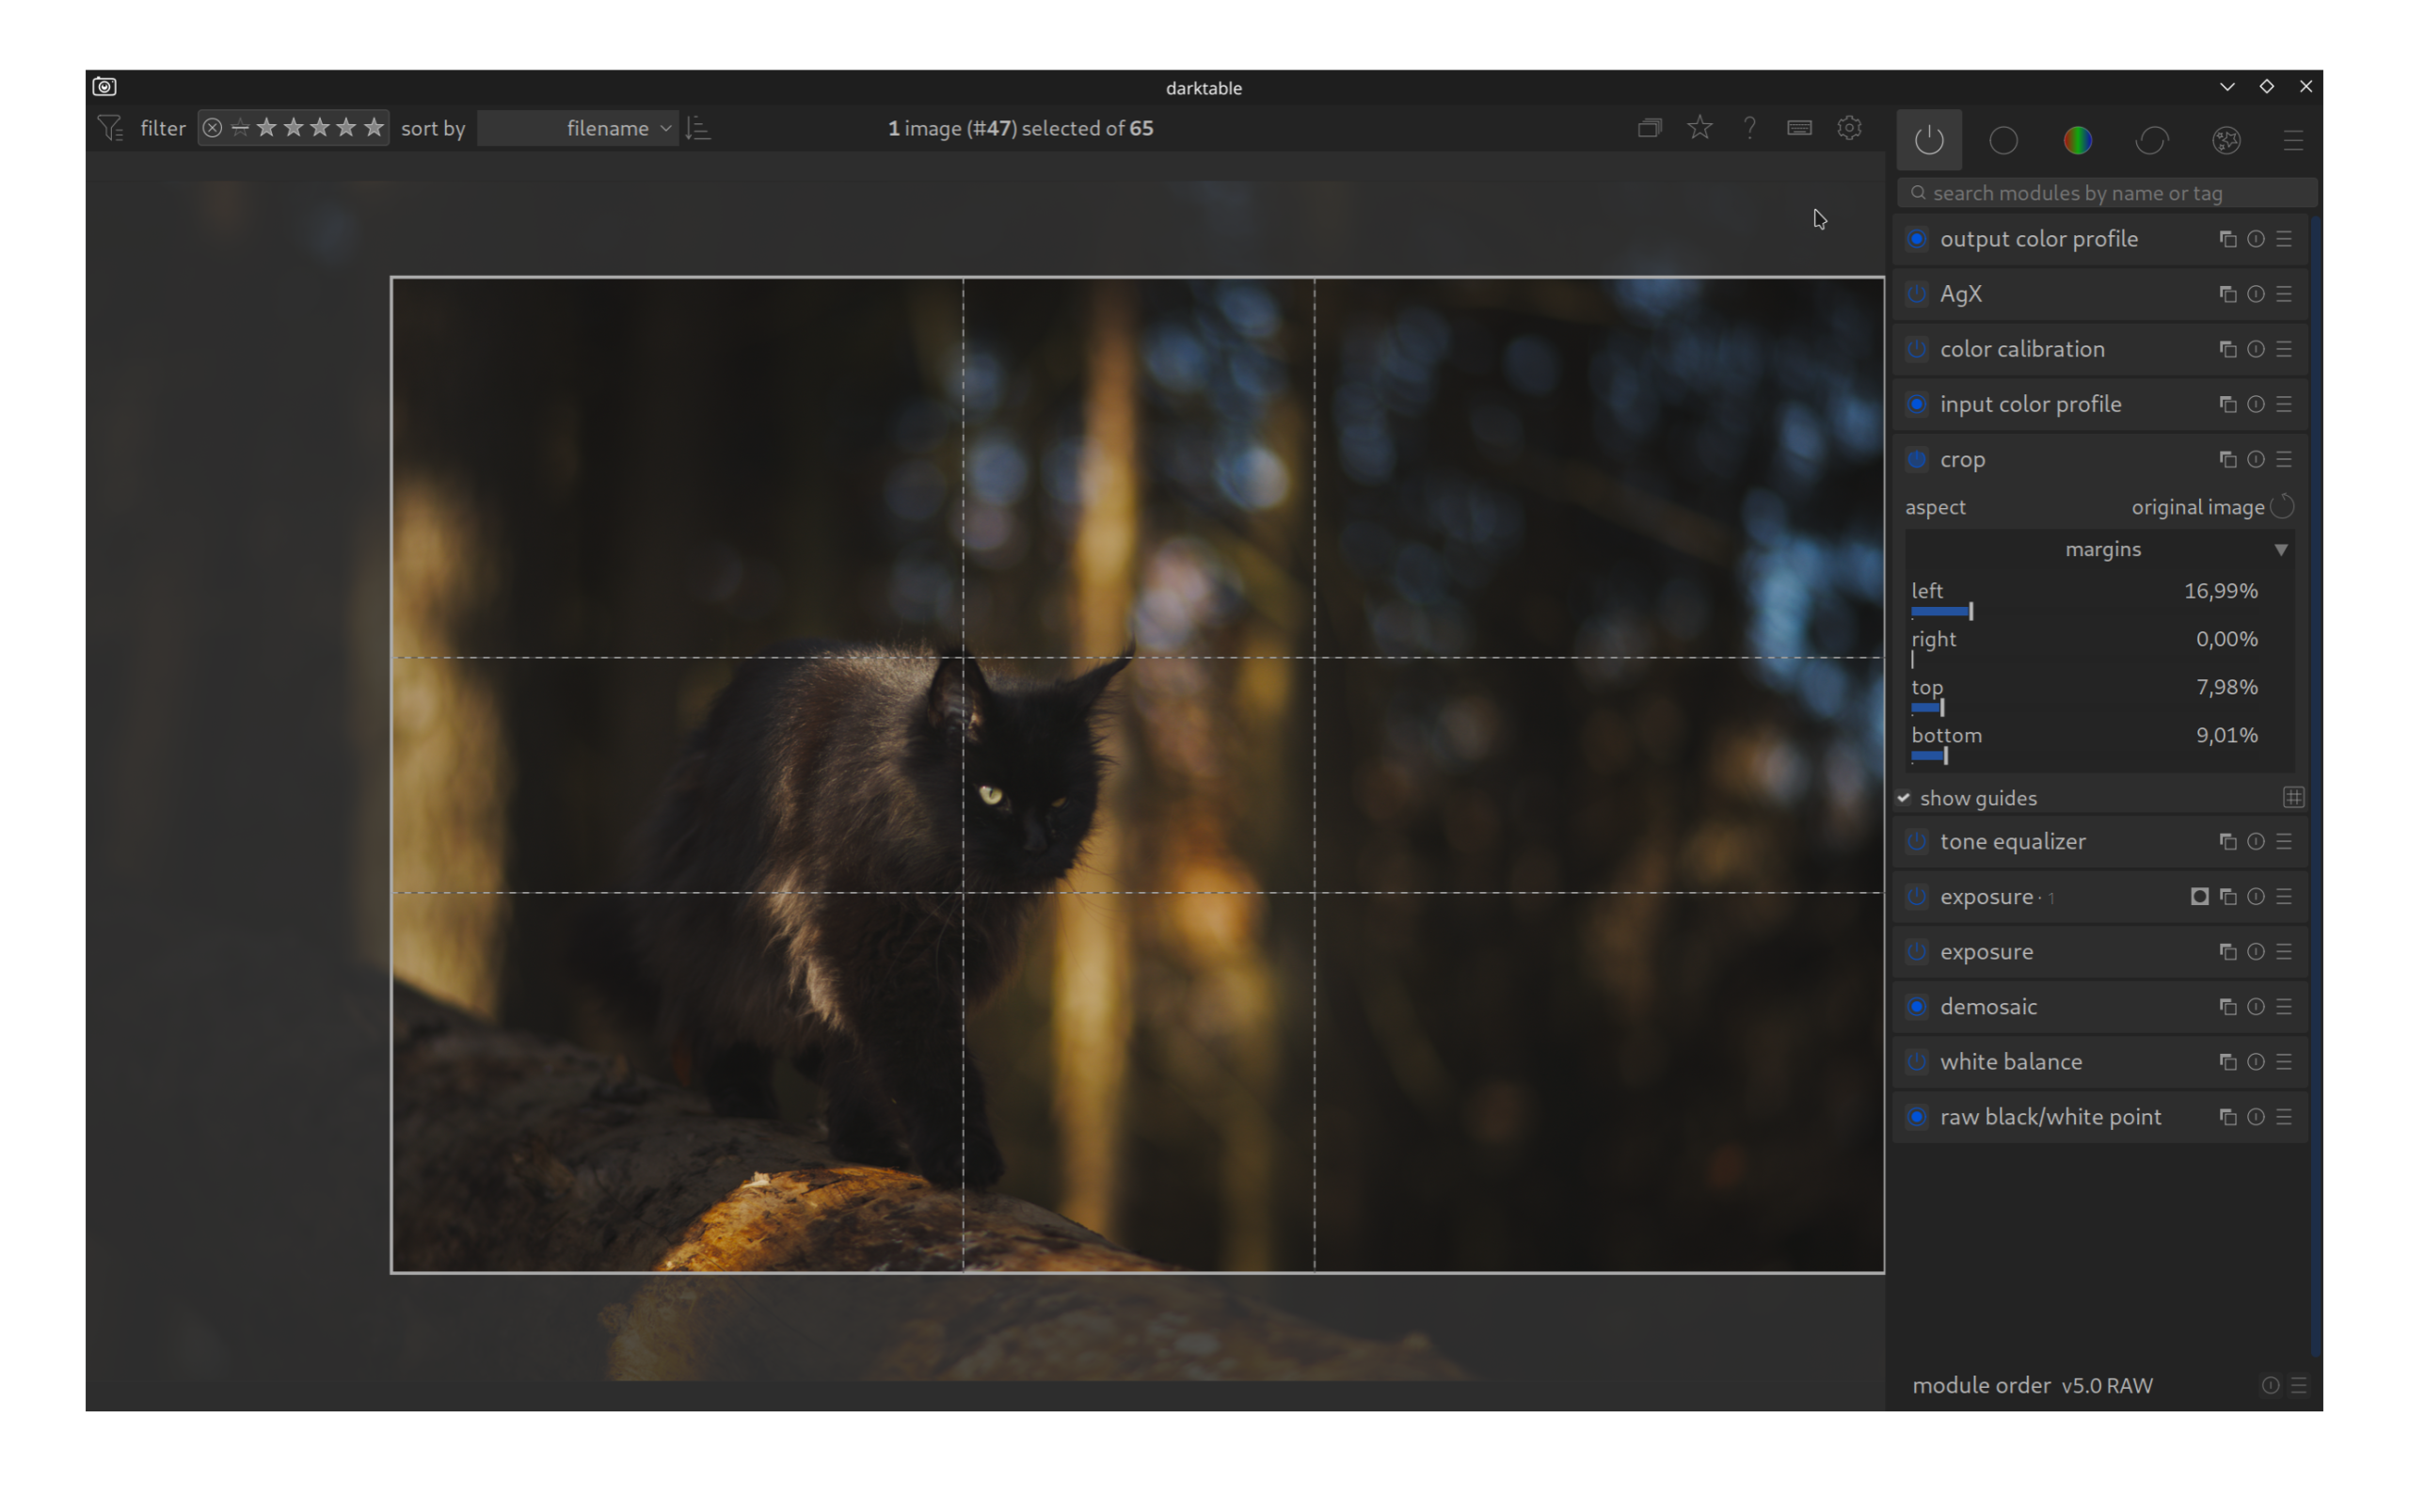
Crop
The final image crop decides the image impact.
Application: The original format contains many irrelevant edge areas. By cropping tighter, we place the cat more prominently in the image (e.g., according to the rule of thirds). Distracting elements at the edge of the image are removed, making the composition appear calmer and more focused.